Select Your Gaming App
Parental controls are one of the best tools available to help protect your child while gaming online. Parental controls reduce risks but cannot eliminate them completely. Regular conversations, periodic account reviews, and active involvement remain the most effective safety tools.
Select a gaming app below to jump to the Parent Guide for that system, or explore the full guide as you scroll.
Important Note: These guides were created in the summer of 2026. Because online platforms, apps, and their parental control settings are updated frequently, the steps and screenshots shown in these guides may change over time. If something looks different on your device, don’t be alarmed. Look for the closest corresponding settings or options, as the location, wording, and appearance of features may have changed.
DISCORD
Discord has a Family Center feature that allows parents to link their Discord profile to their teen’s account. Linking profiles will let parents view and manage their child’s activity on Discord.
To set up Family Center:
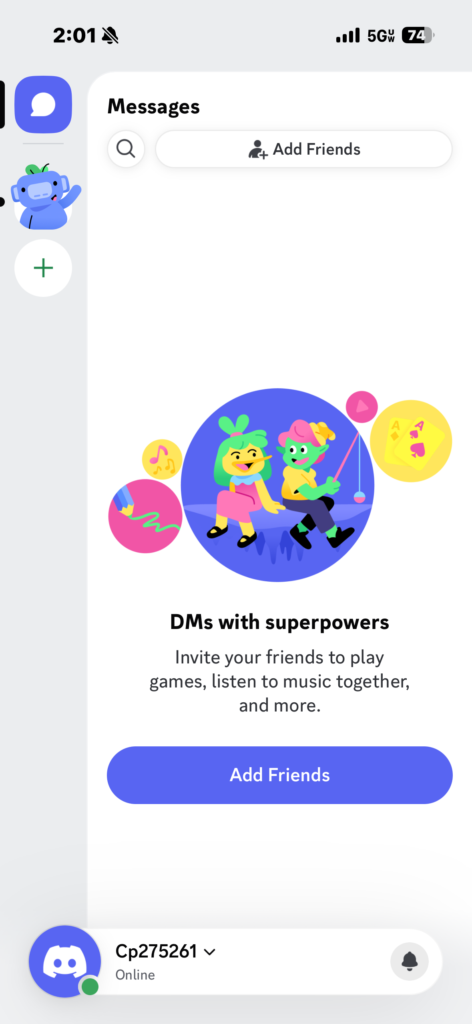
Step 1 – From the Discord Home Screen, click your username at the bottom.
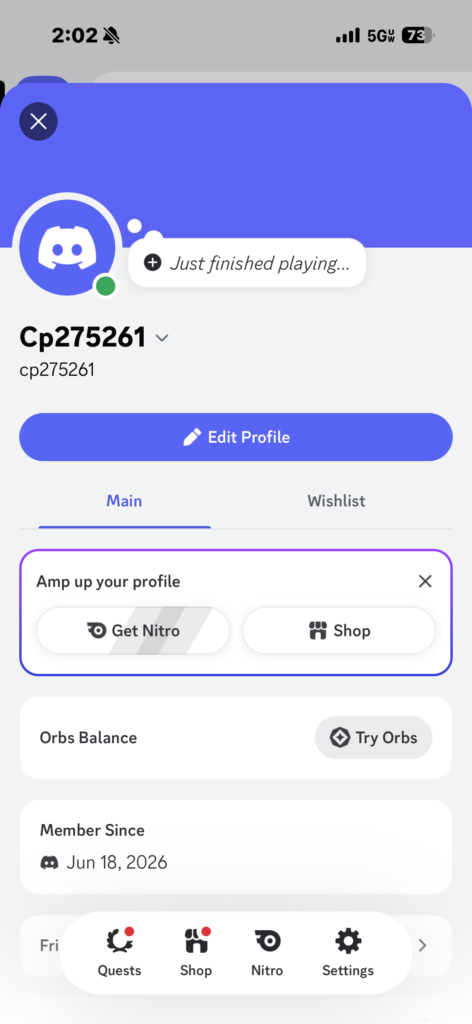
Step 2 – On your profile page, click the gear icon at the bottom right of the screen.
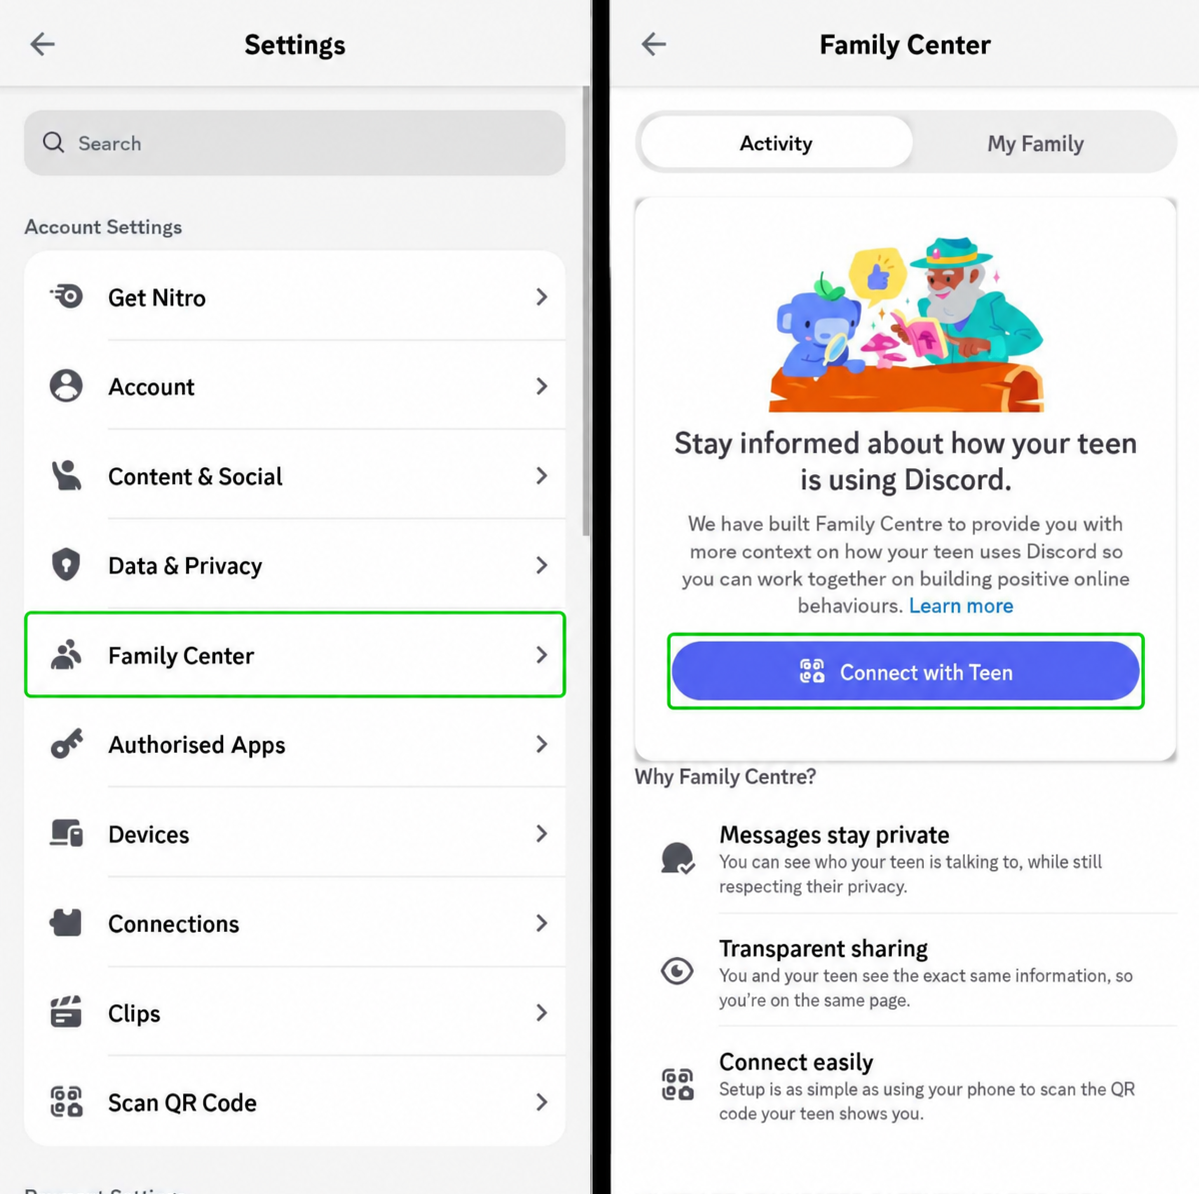
Step 3 – In the Settings, select Family Center.
Step 4 – On the Family Center screen, click Connect with Teen.
Step 5 – You will now have to scan a QR code on your child’s screen. This will send your child a request to link your profiles. Once your child accepts, Family Center will be set up.
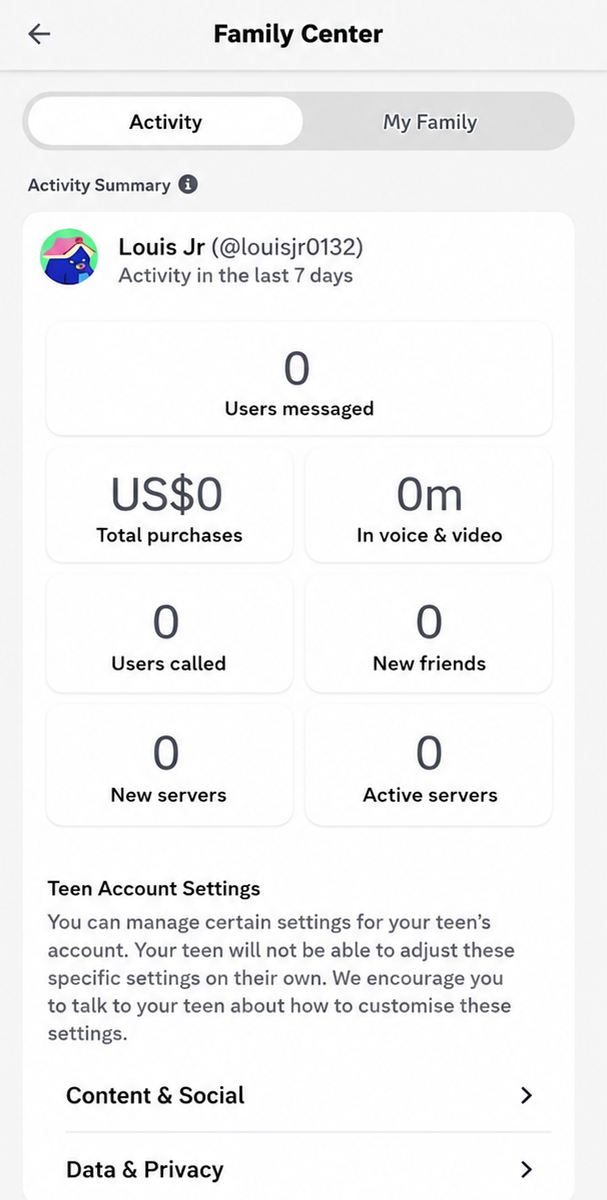
Step 6 – Now that Family Center is set up, you can view how many users your child has messaged or called, any new friends and how many servers they are in.
Editing Discord content and social features
In Family Center, you can edit the messaging and content settings on your child’s account.
To set up Family Center:
Step 1 – From the Discord Home Screen, click your username at the bottom.
Step 2 – On your profile page, click the gear icon at the bottom right of the screen.
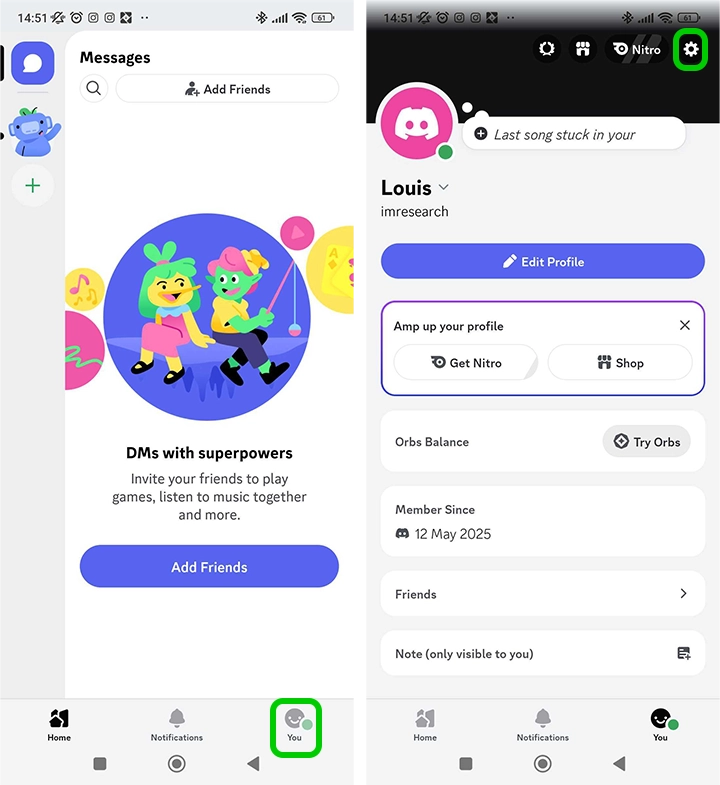
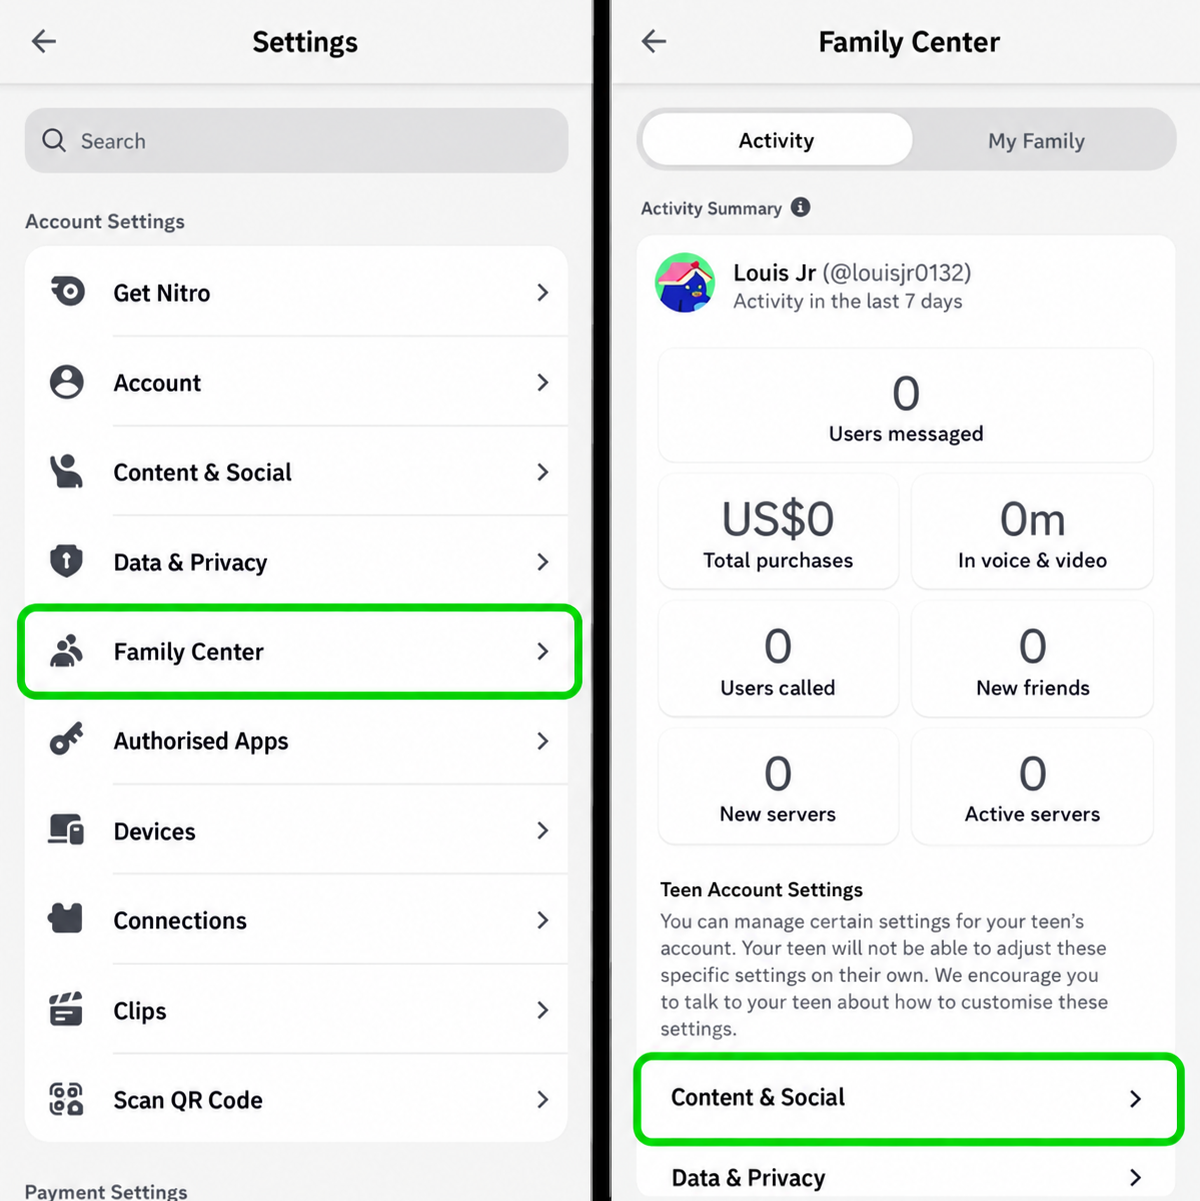
Step 3 – In the Settings, select Family Center.
Step 4 – On the Family Center screen, click Content & Social.
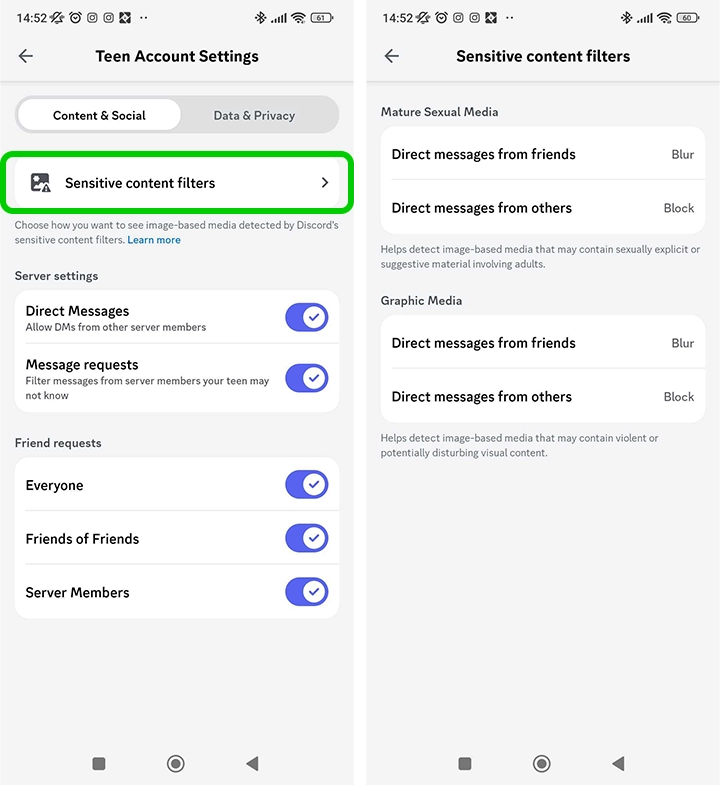
Step 5 – On the first page you can edit social settings using the toggles on the right. To set content filters, select Sensitive content filters.
Step 6 – Inside the Sensitive content filters, you can decide to blur or block sexual and graphic media by clicking on each option.
Filtering for spam
You can choose to filter your messages for spam on Discord. This is done through the settings on your child’s account, not through Family Center. Filtering messages for spam should prevent your child from receiving unsolicited bulk messaging or advertising.
To filter spam:
Step 1 – On the Content & Social screen, navigate to the Direct Message spam section.
Step 2 – Choose to either Filter all messages or Filter from non-friends . This will prevent strangers from spam messaging your child.
Messages that are identified as containing spam will be automatically sent to a separate spam inbox.
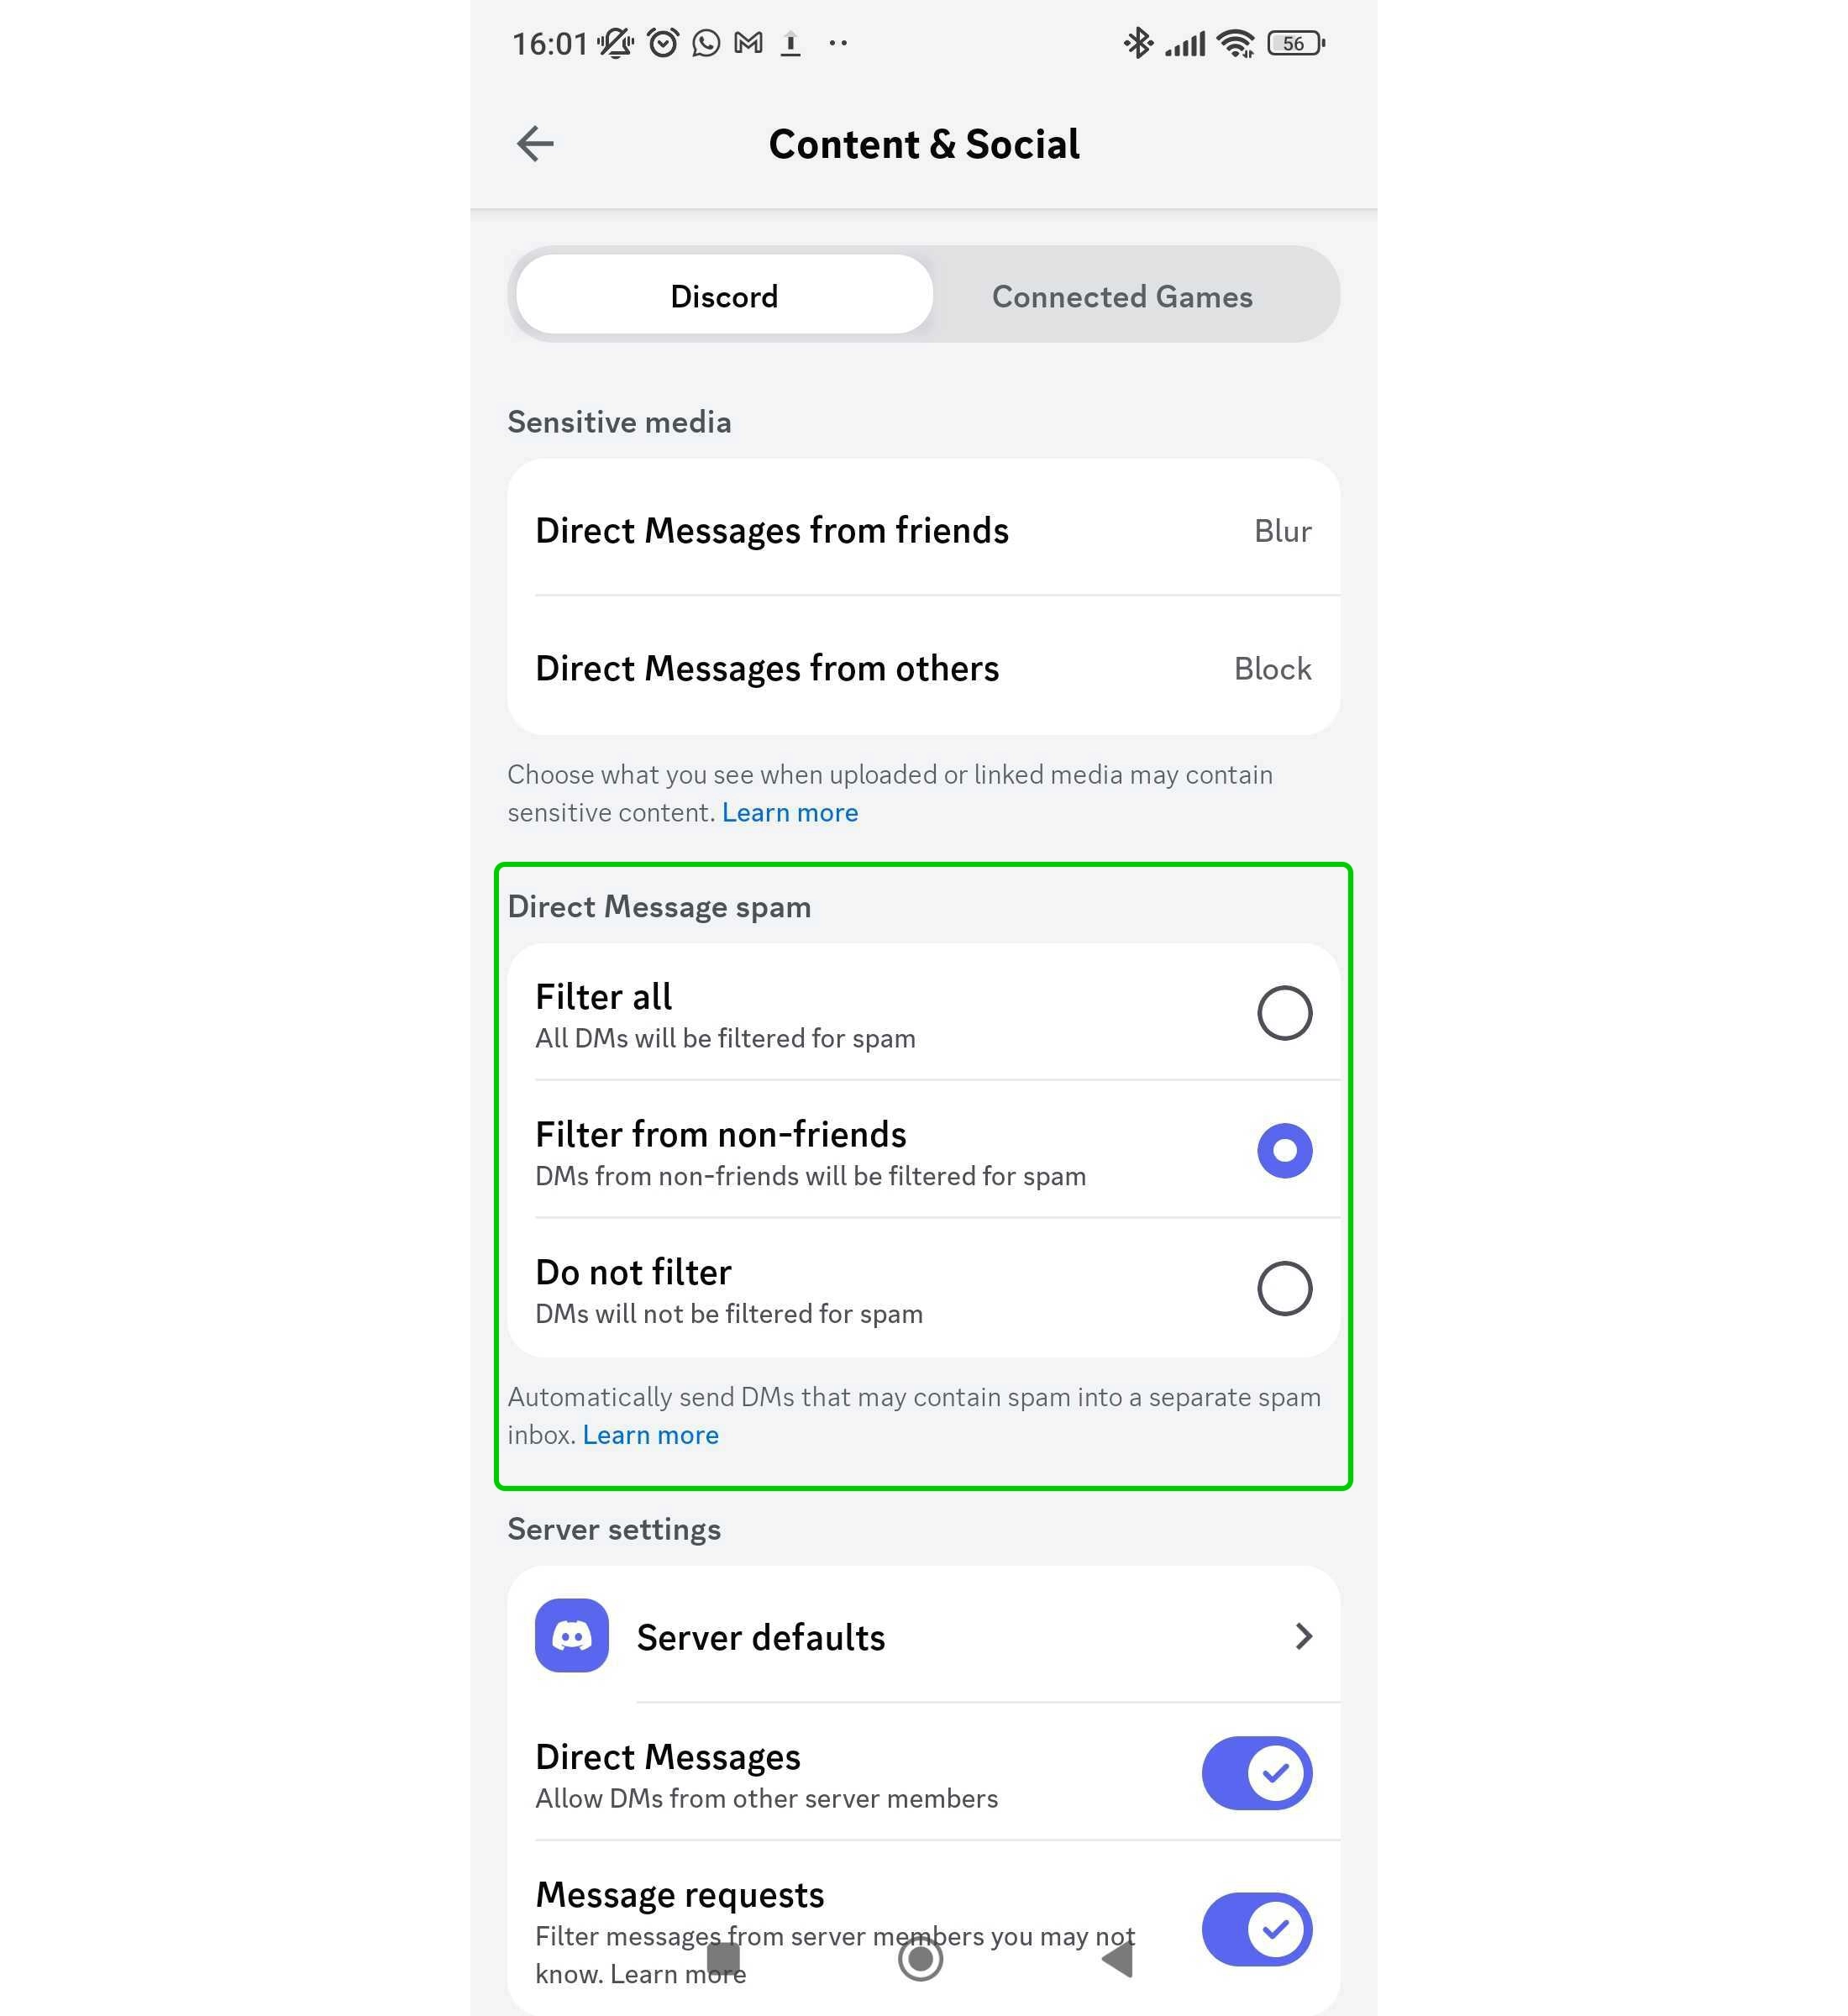
How to enable Twitch Chat Filters
Step 1: While viewing a live video, click the three dots in the lower right-hand corner
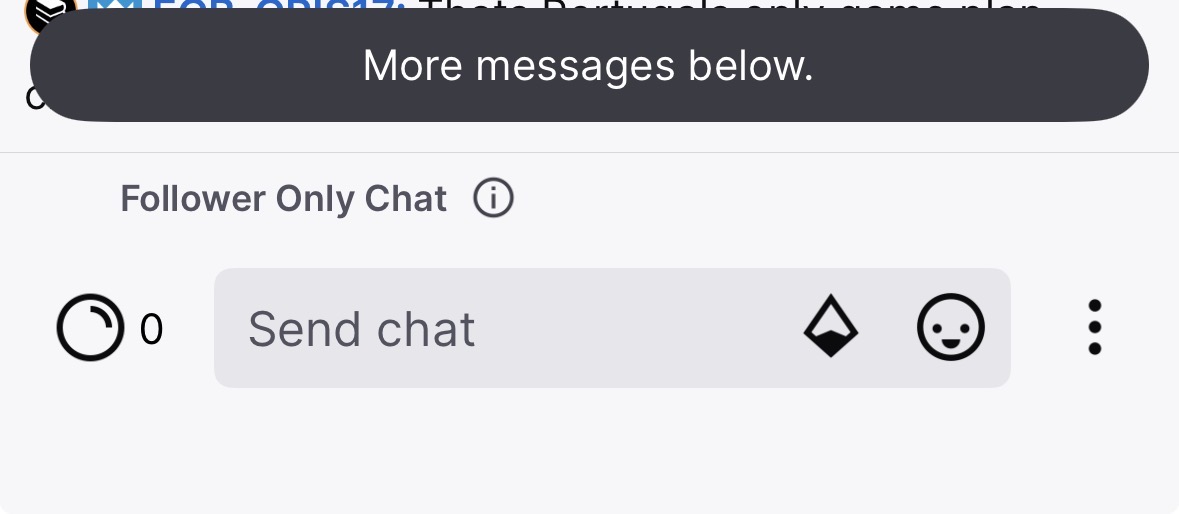
Step 2: Select Hide Offensive Language
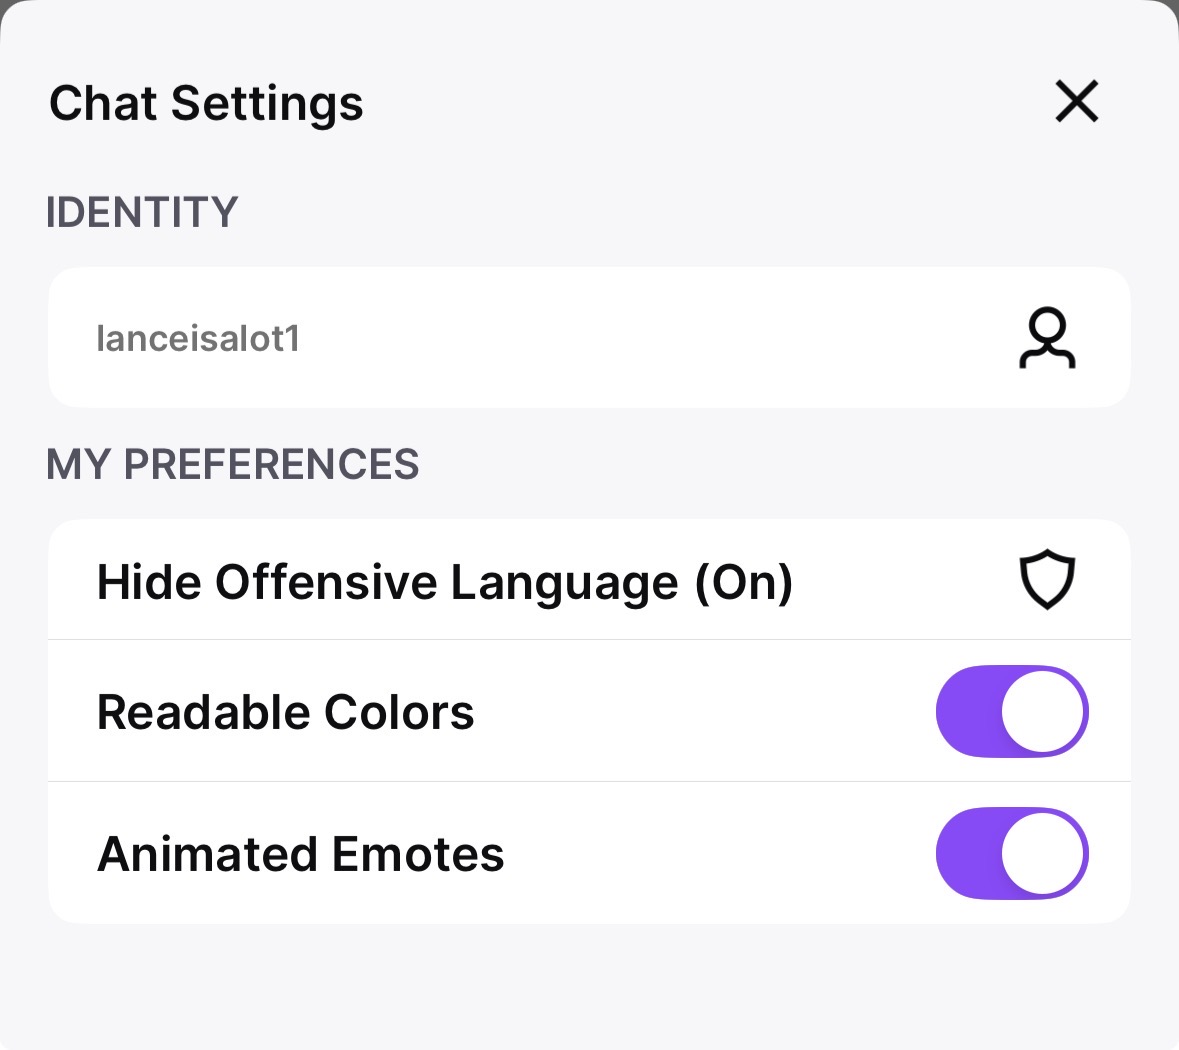
Step 3: Adjust the settings to what you think is best for your family.
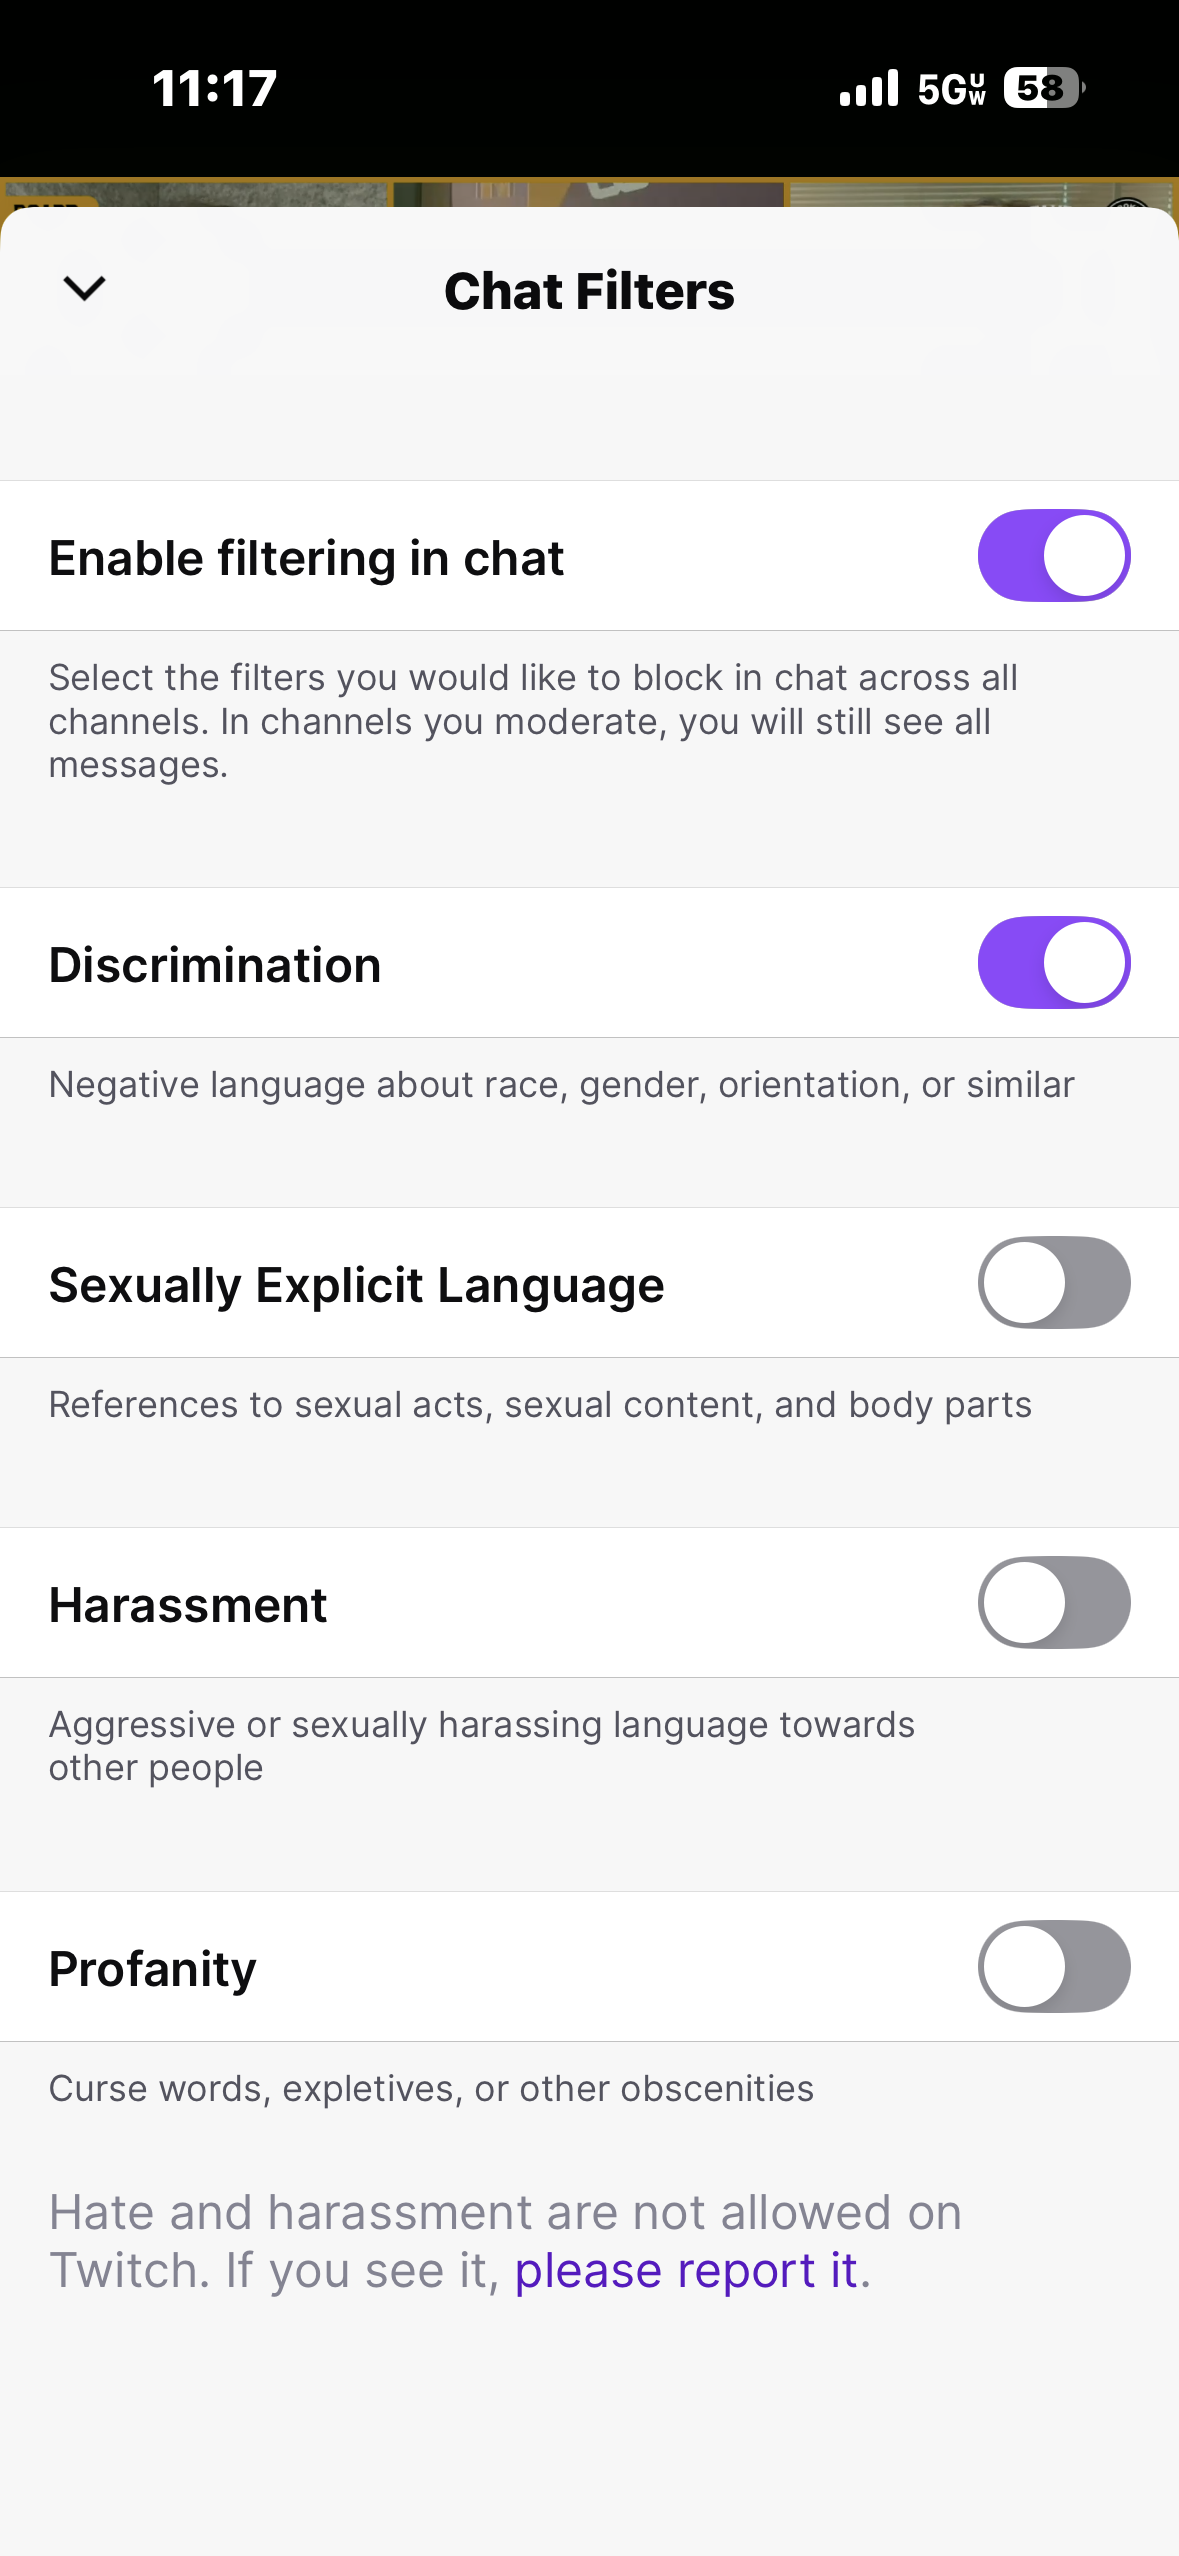
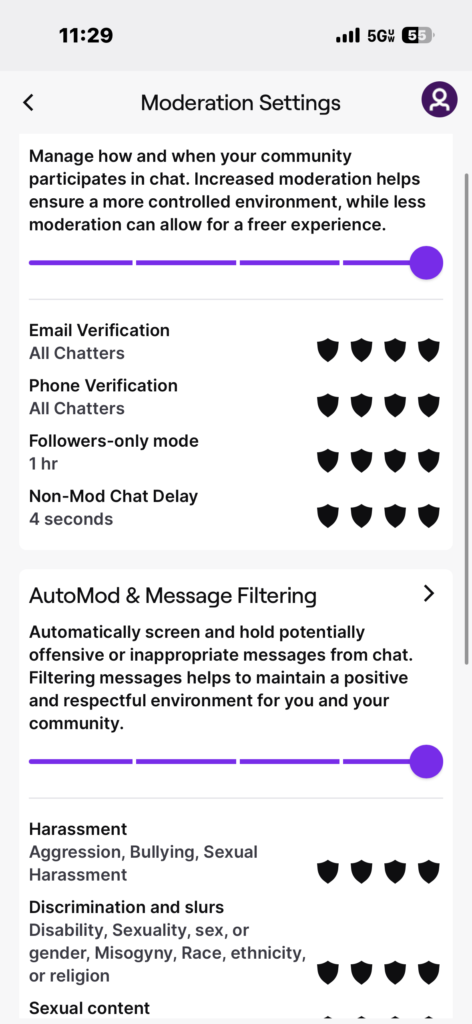
How to enable Twitch Moderation Settings
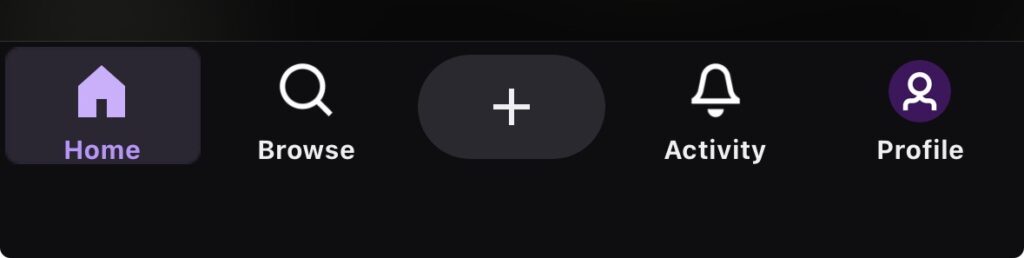
Step 1: From the home screen, click on Profile in the lower right corner
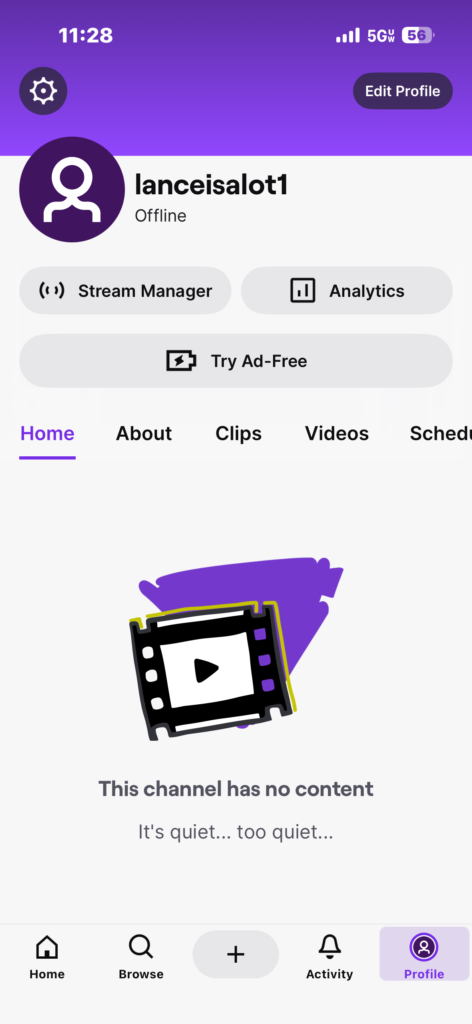
Step 2: Click on the gear icon in the top left corner.
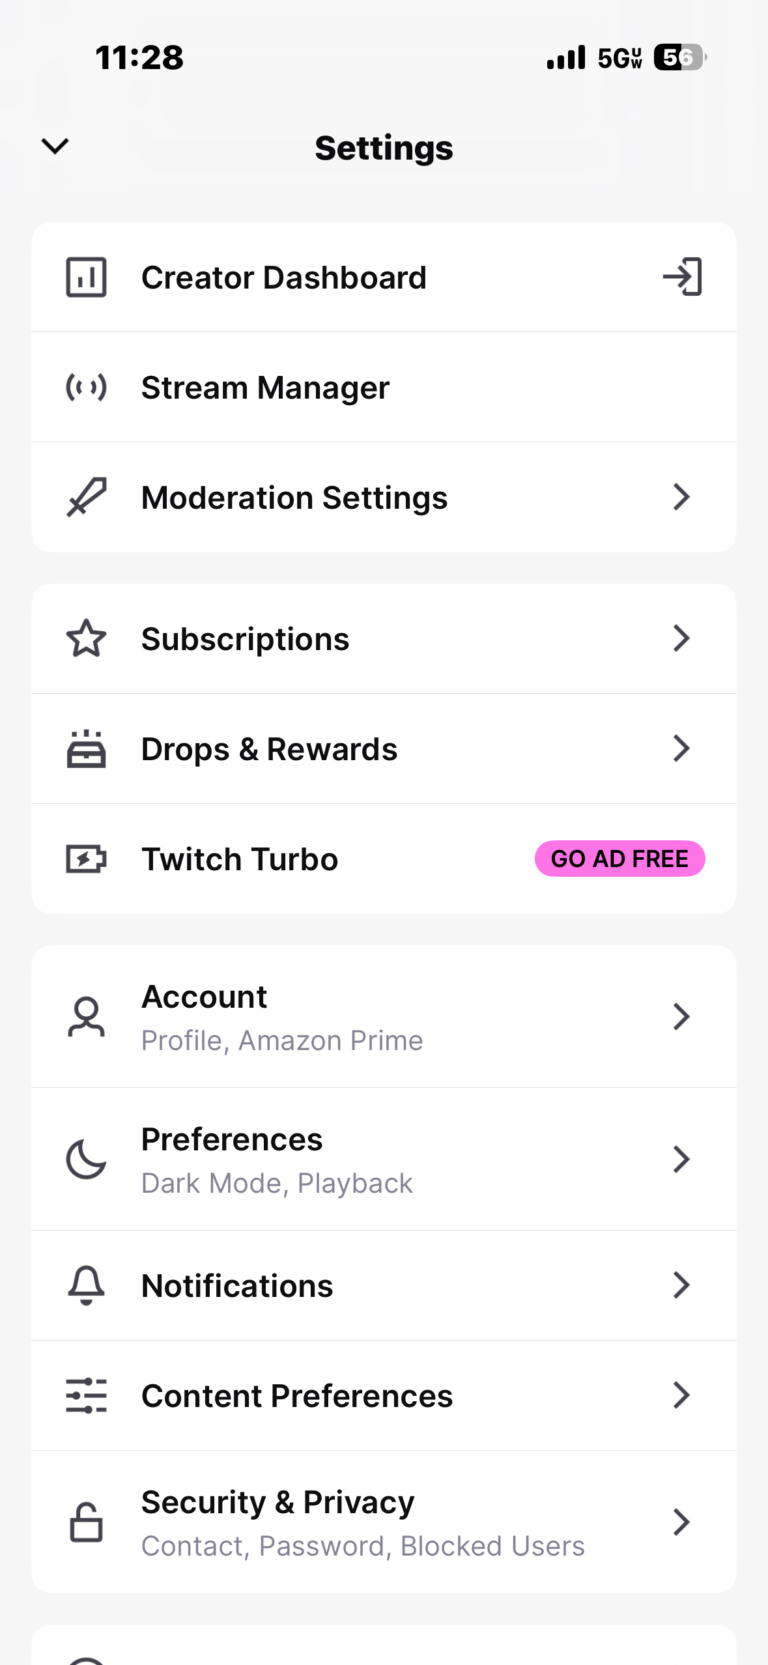
Step 3: Click on Moderation Settings and then click moderation settings again.
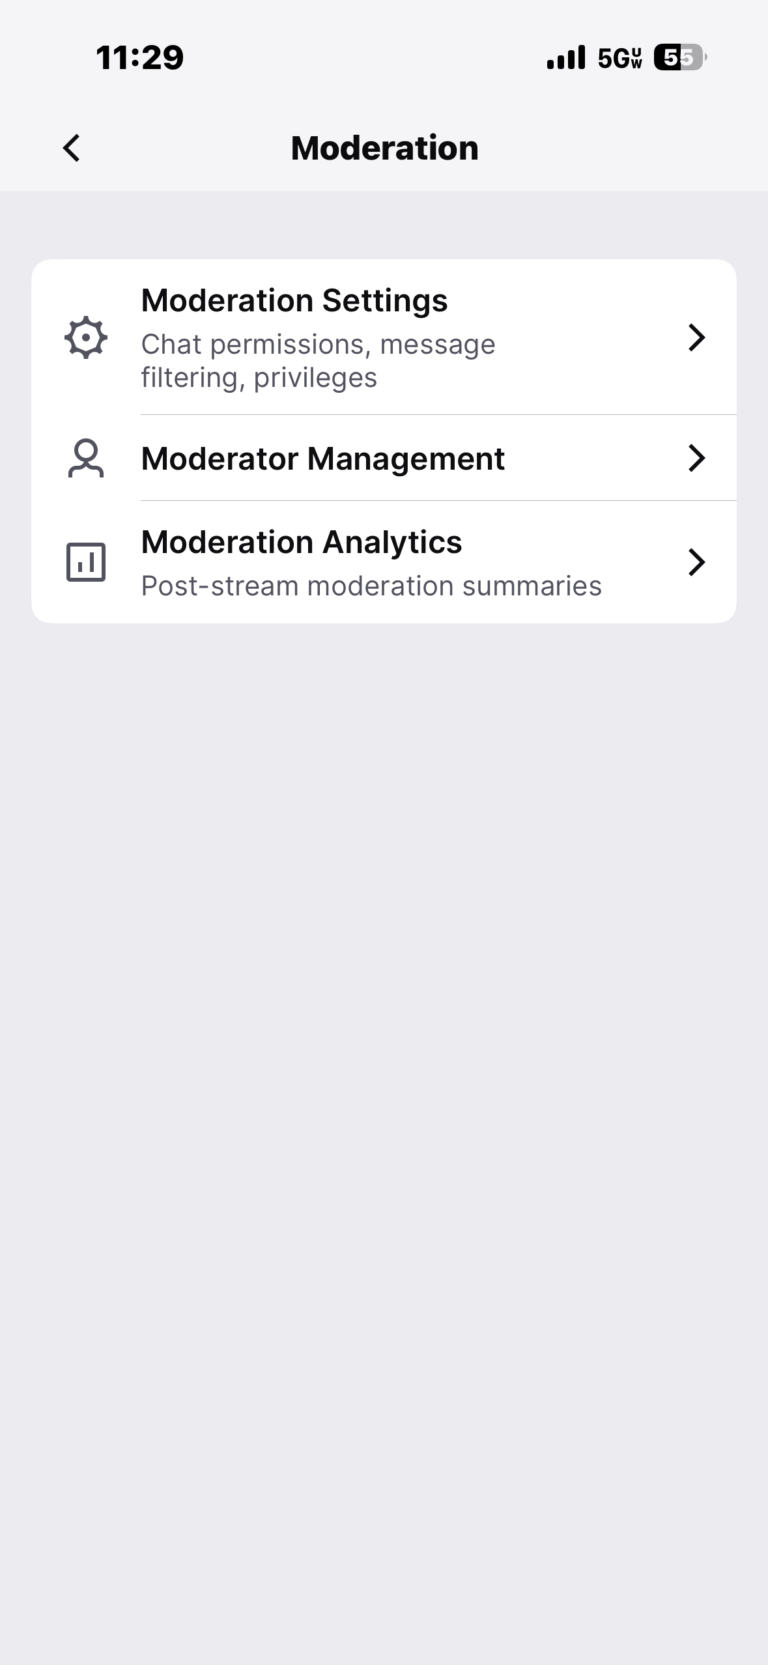
Step 4: Adjust the settings to what you think is best for your family.
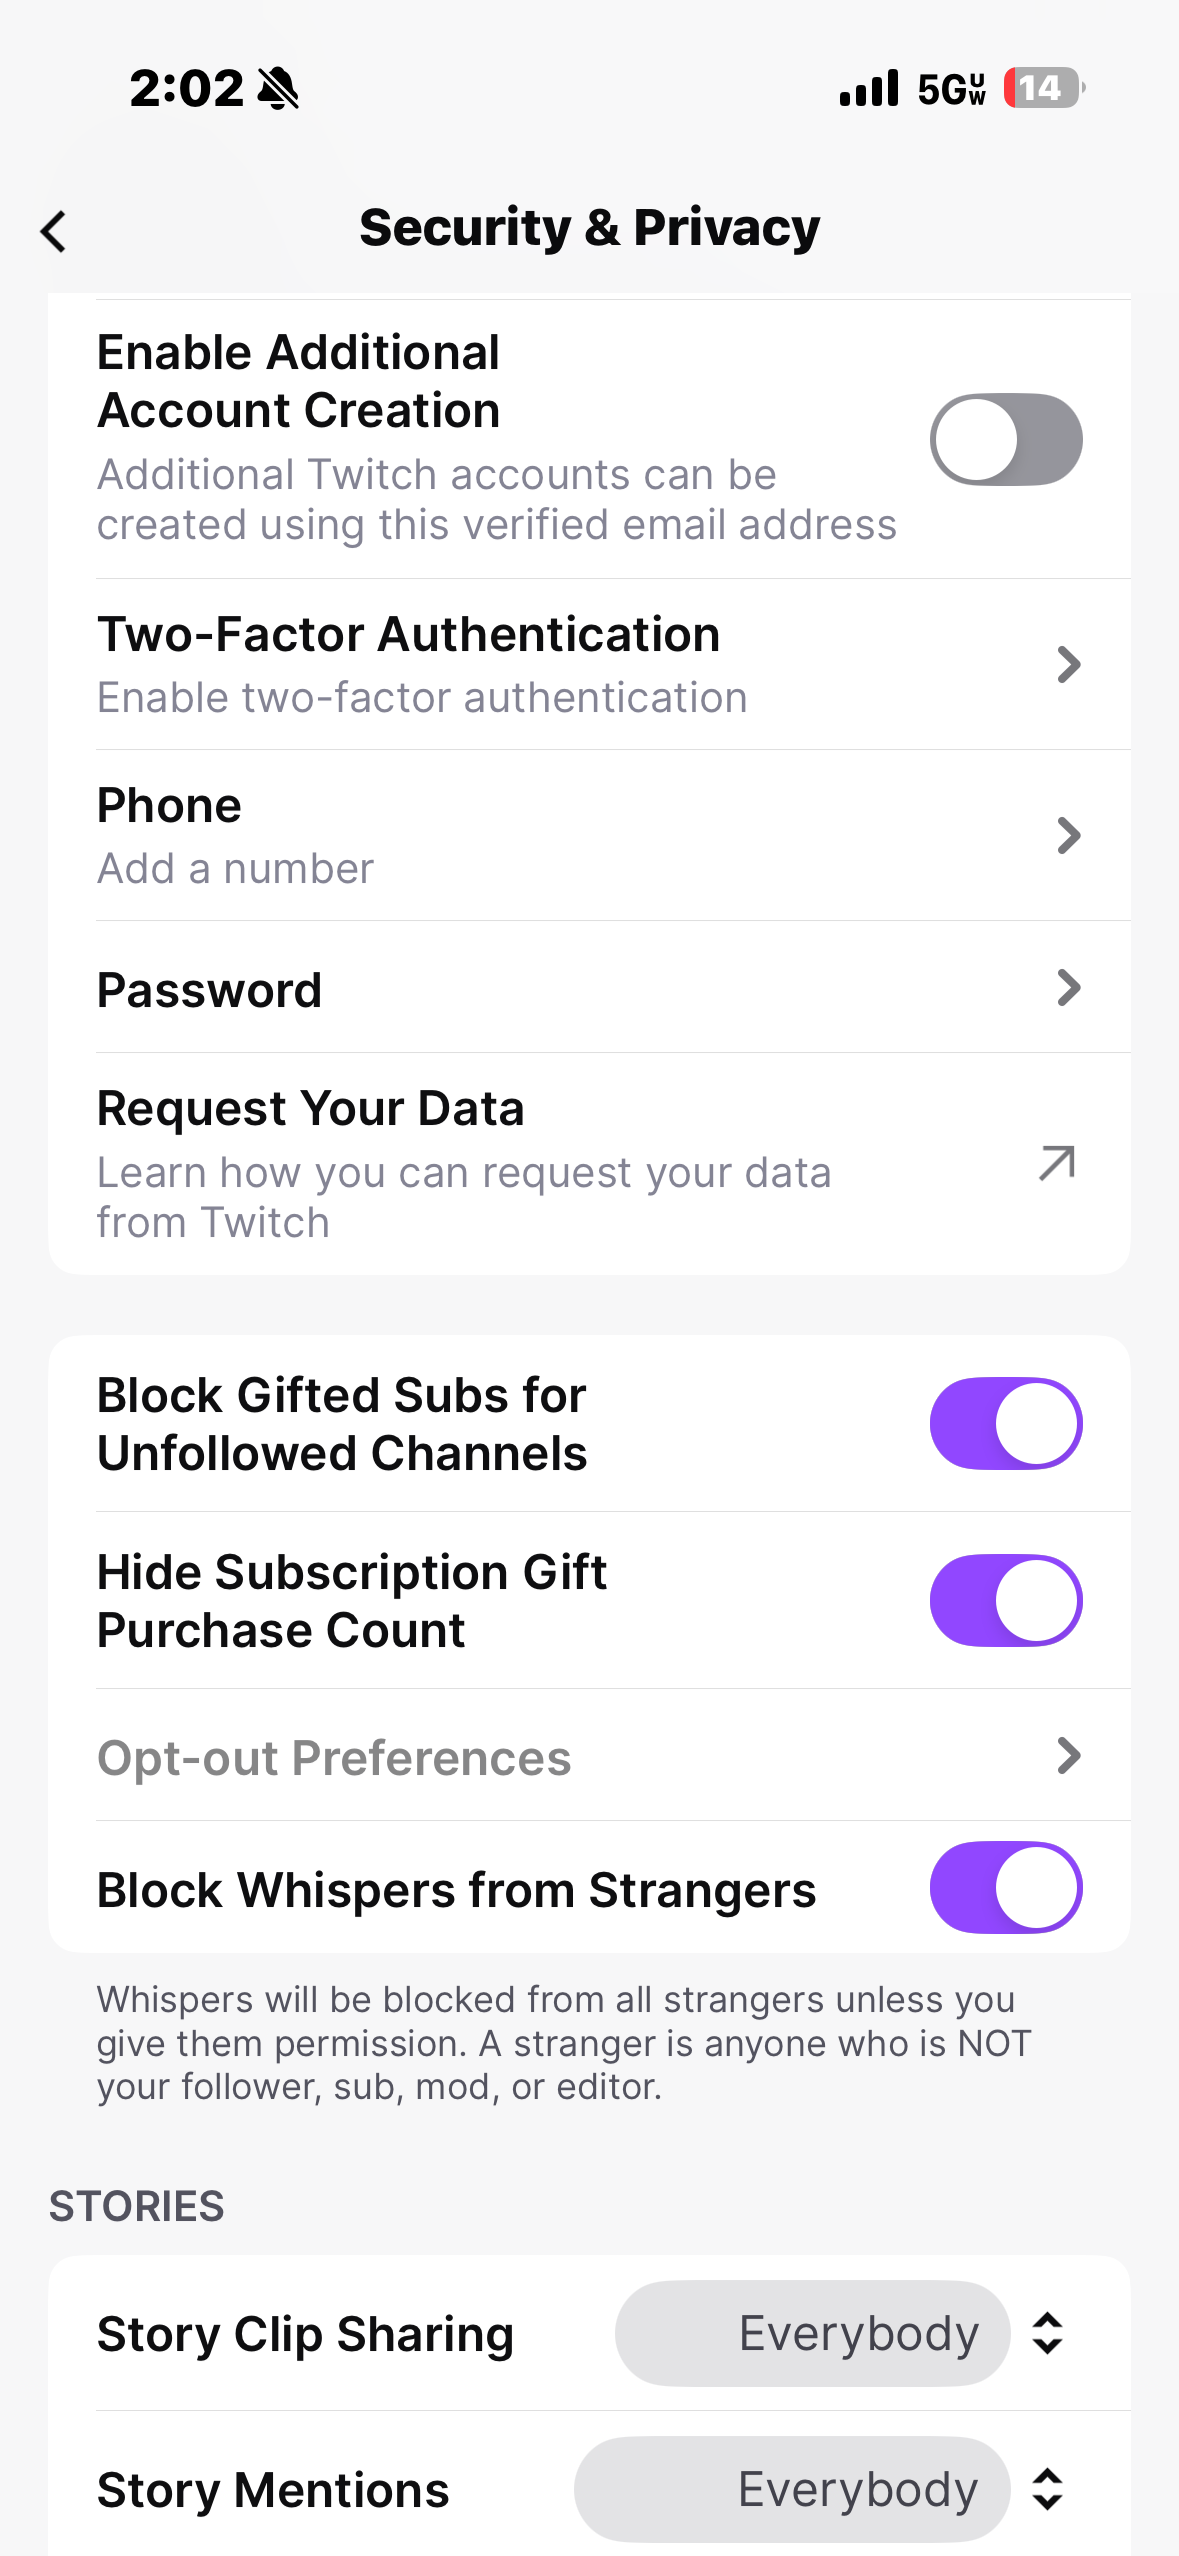
How to disable “Whispers” (Private Messaging)
and receiving gifts from strangers
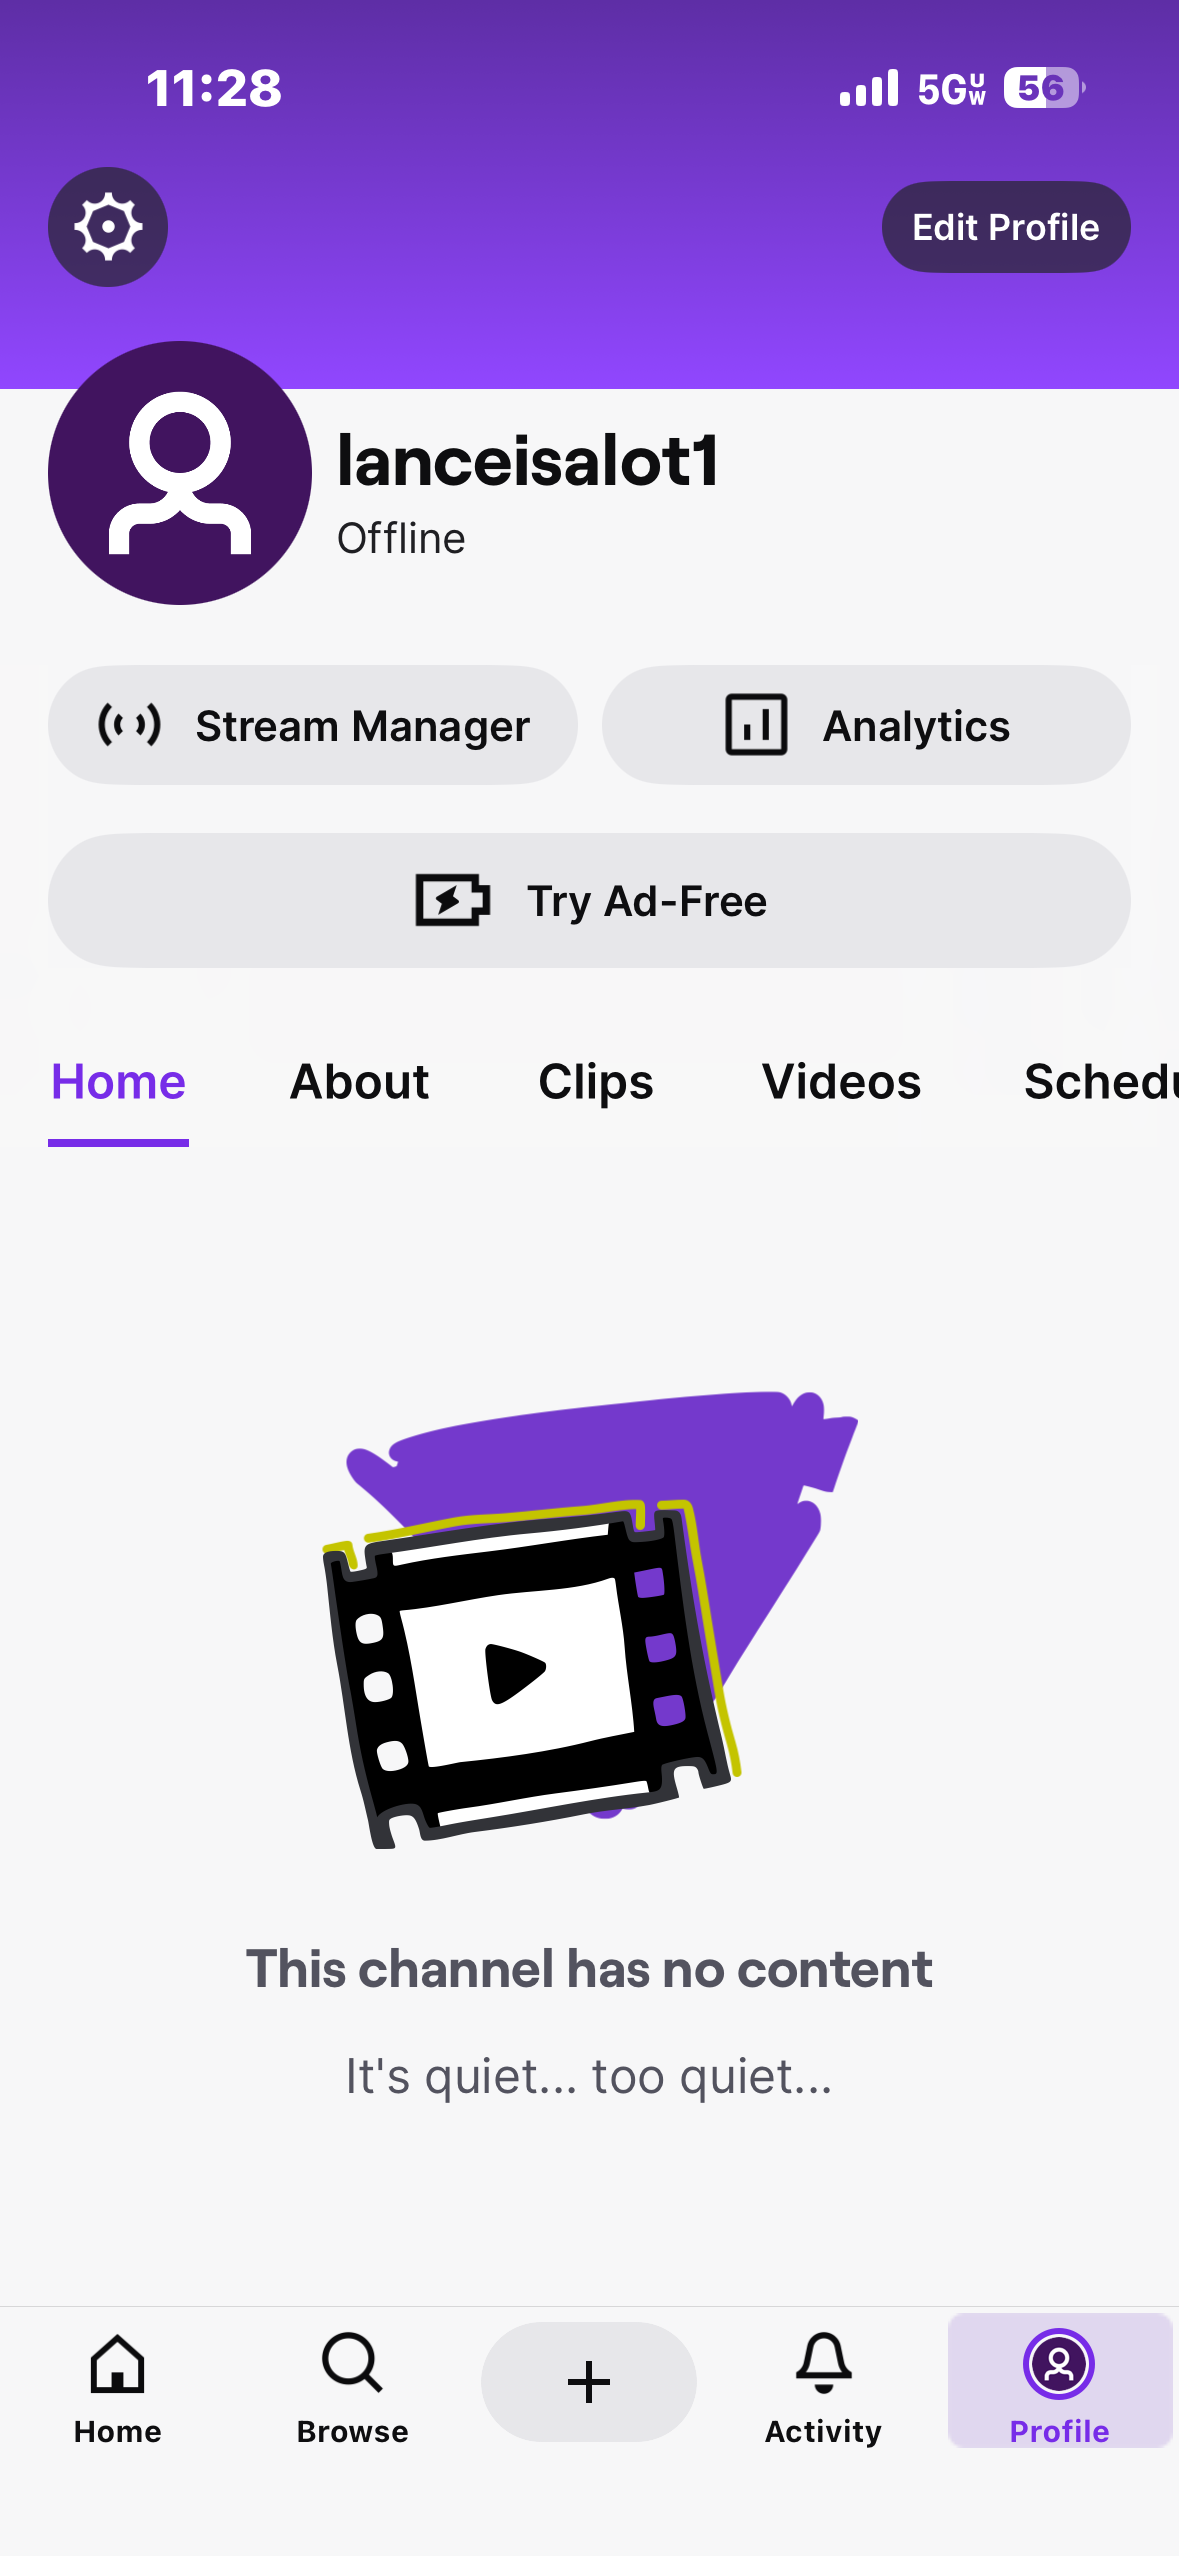
Step 1: From the home screen, click on Profile in the lower right corner
Step 2: Click on the gear icon in the top left corner.
Step 3: Click on Security & Privacy
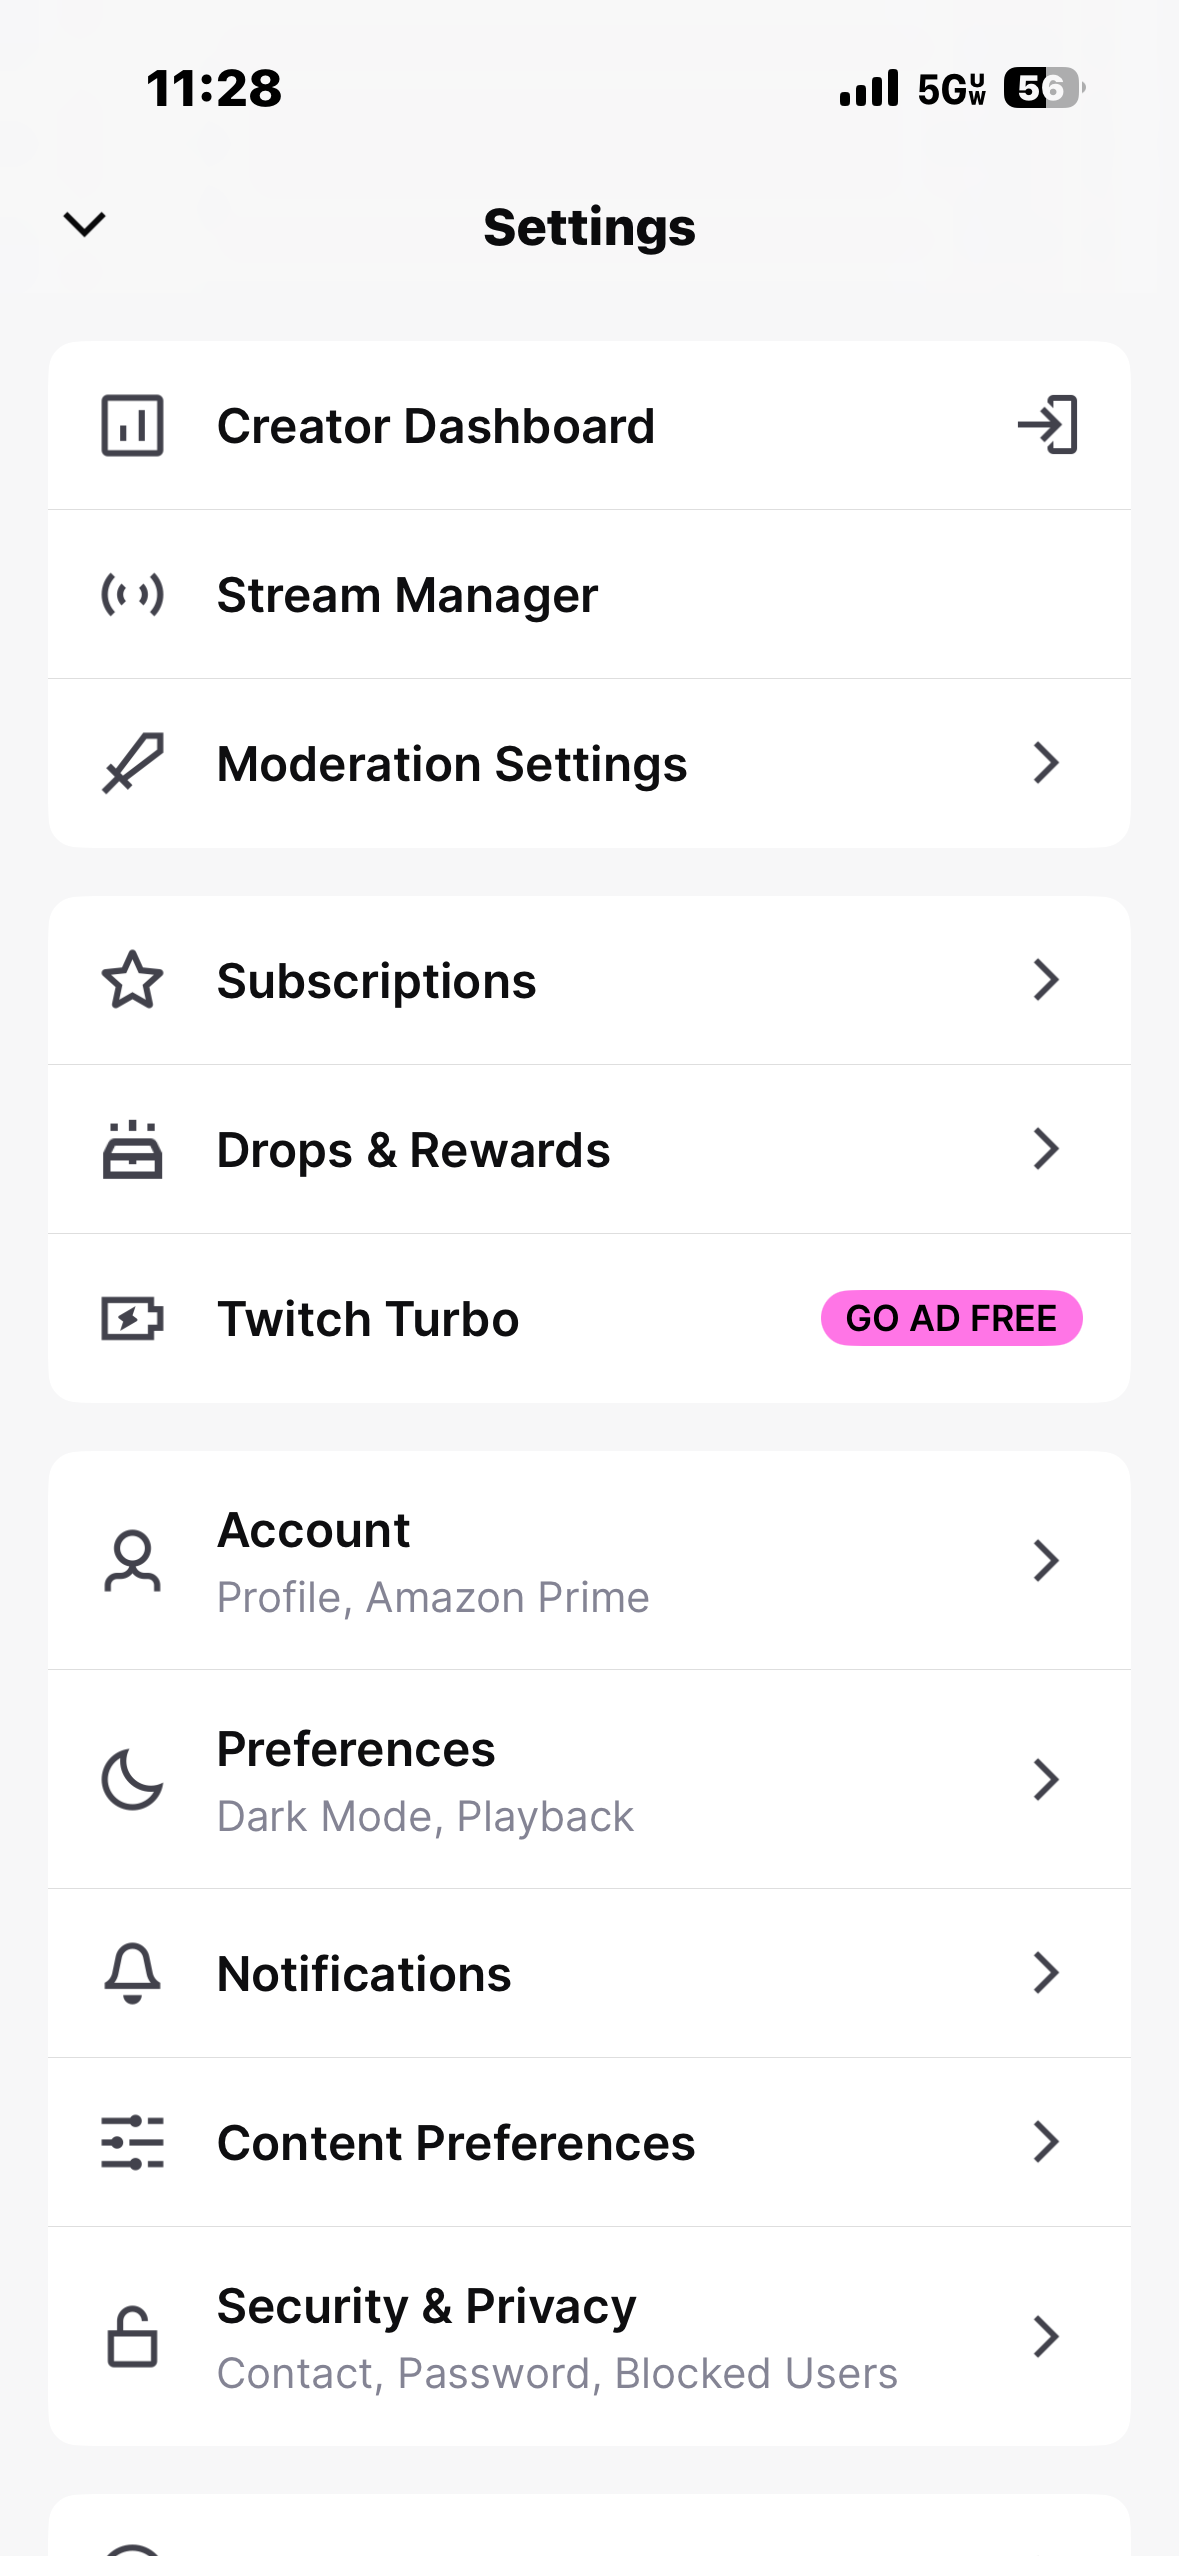
Step 4: Toggle the settings to what you desire for your family.
If turned on, this will prevent accounts from sending your teen private messages or gifts.
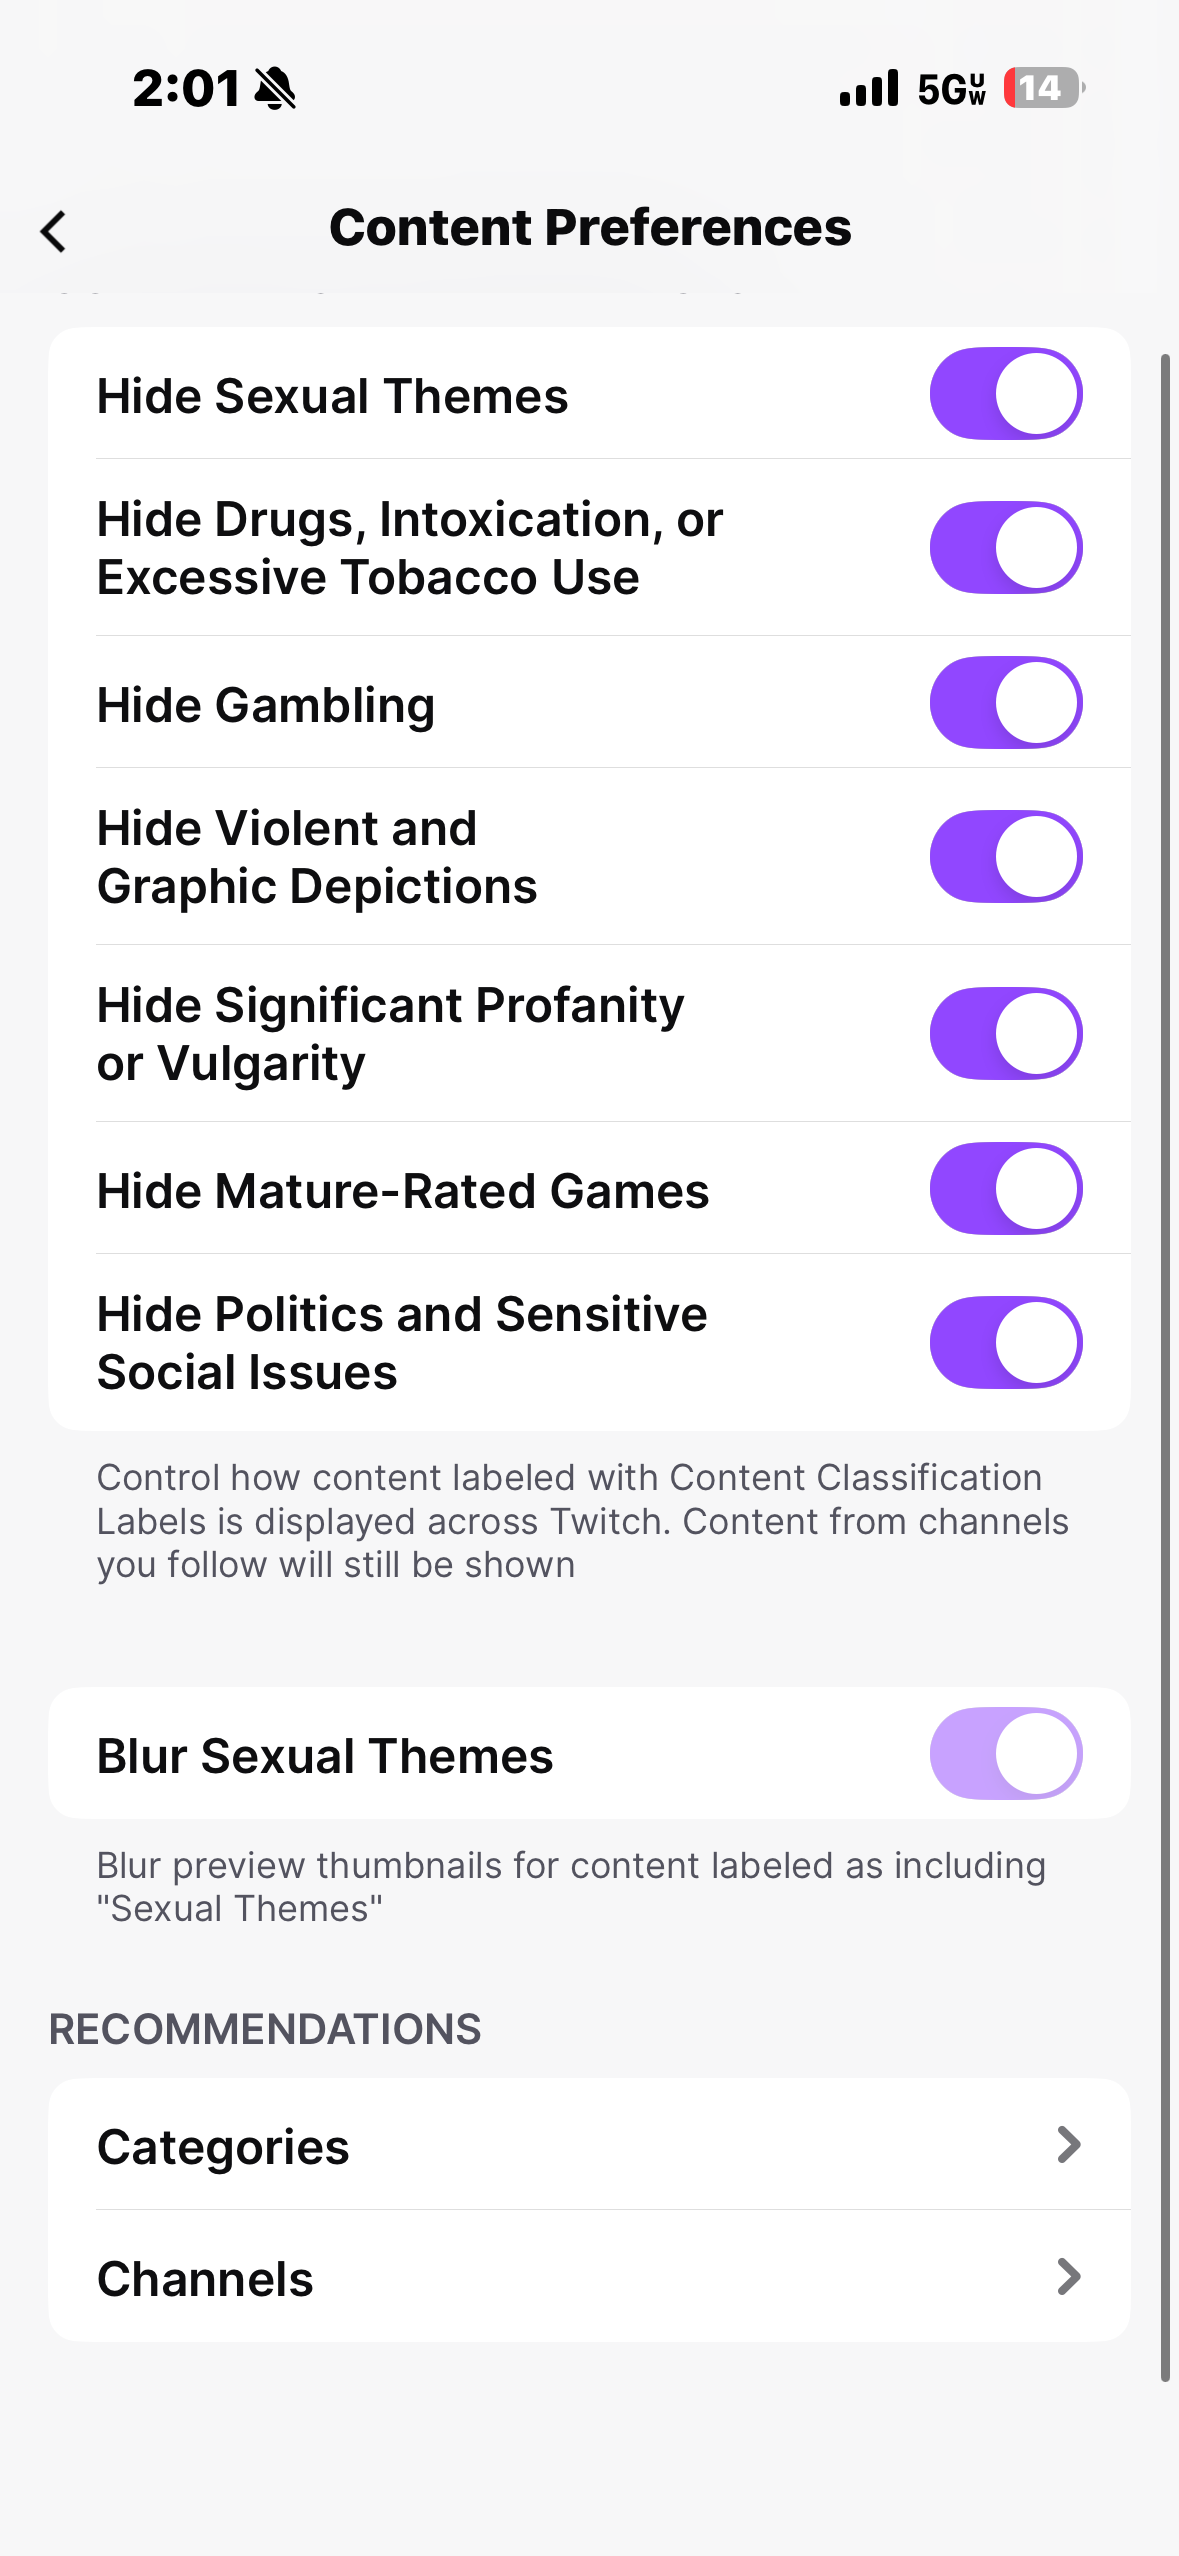
How to manage Twitch content preferences
Step 1: From the home screen, click on Profile in the lower right corner.
Step 2: Click on the gear icon in the top left corner.
Step 3: Click on Content Preferences
Step 4: Toggle the settings to what you desire for your family.
Parental Controls
How to set parental controls on Steam
You will need access to your child’s account or have your own account to use Steam’s parental controls.
Family Management on Steam
Family Management is a parental controls tool available within the Steam client (desktop app). You can add up to 6 members (including yourself) to a Family as either an adult or child.
To set up Family Management:
Step 1 – Make sure both you and your child have Steam accounts with accurate birthdays. Then open up the Steam client (desktop app) with your account.
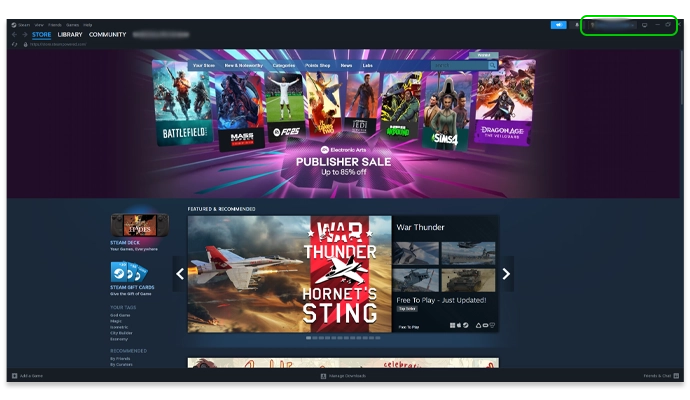
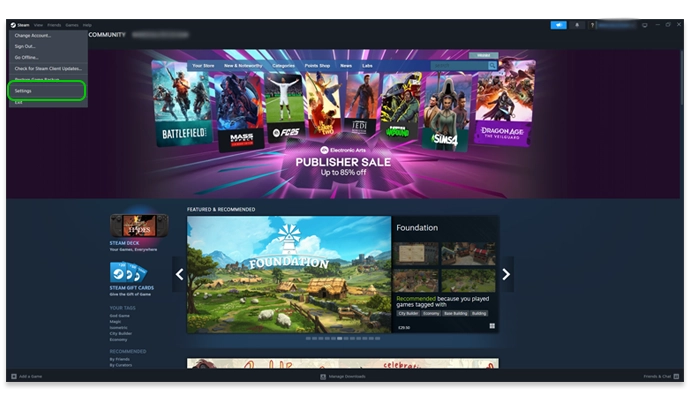
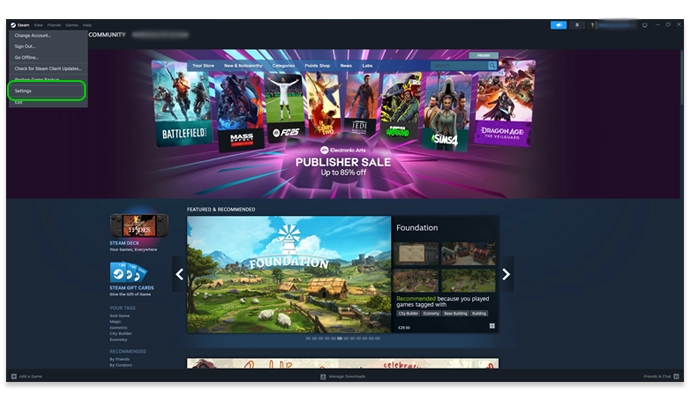
Step 2 – Click Steam in the top left corner and then Settings .
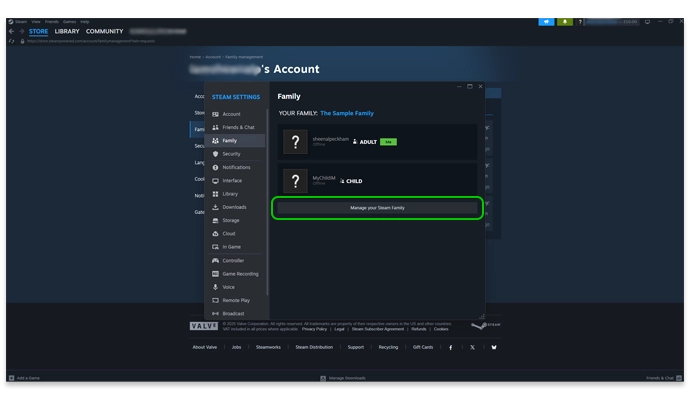
Step 3 – Click Family and then Create or Join a Steam Family .
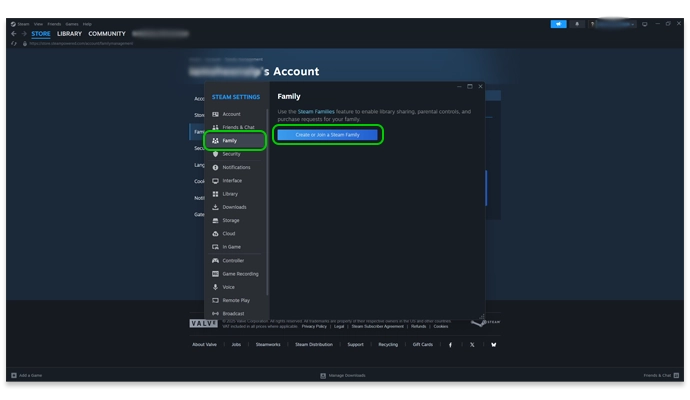
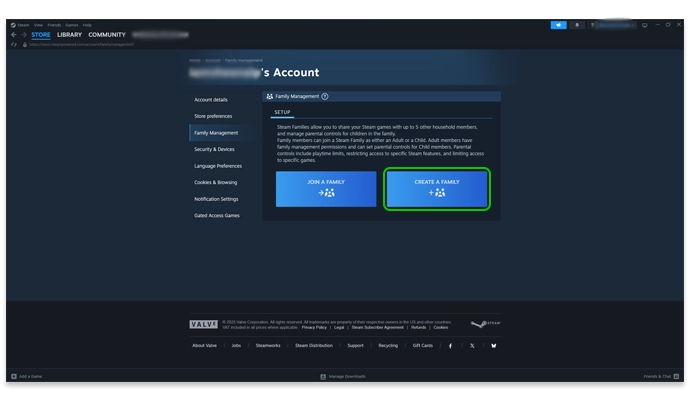
Step 4 – Click CREATE A FAMILY and then enter a name to represent your family.
Note: If you have not made any purchases on Steam, you might see a message about having a limited account, which disallows you from creating a Family. If this happens, a quick fix is to add some money to your account.
Adding a child to your Steam Family
To customize the games your child can play, manage their screen time, and restrict inappropriate content, you must add your child to your Family on Steam.
To add your child’s account:
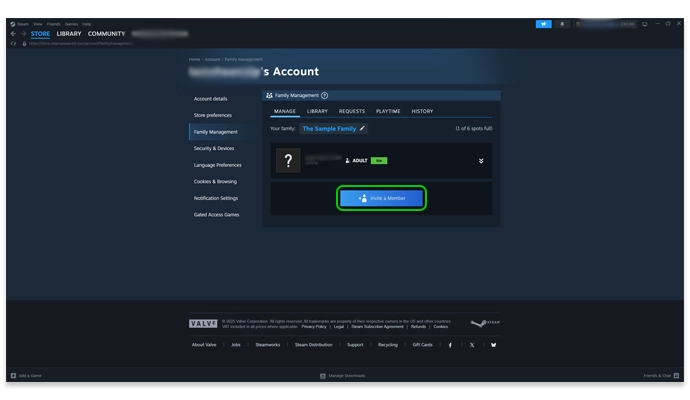
Step 1 – Make sure your child is on your Friends list. Once you’ve created your Family, click Invite a Member.
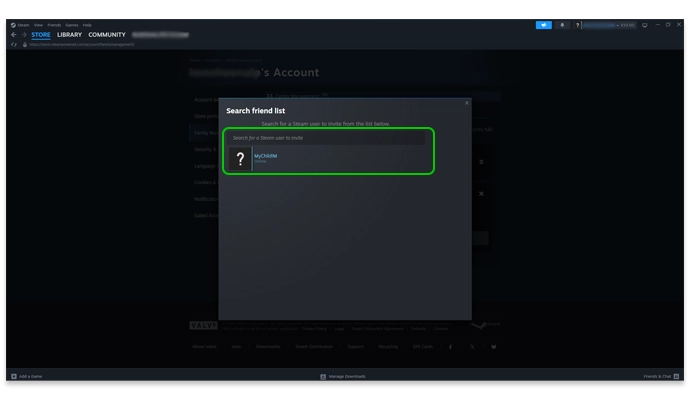
Step 2 – Click Search friend list and then search for your child’s Steam account name. Then select Invite as Child then Invite.
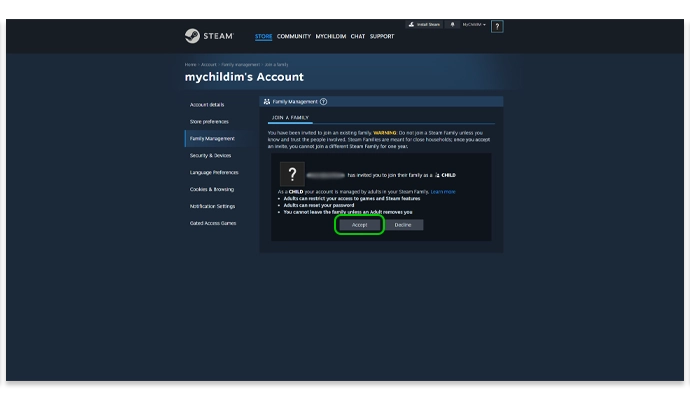
Step 3 – You or your child will need to check their Steam account and email to confirm the request. You’ll then be able to customize parental controls.
How to add your child as a Friend
You must have your child added as a Friend on your Steam account to add them to your Family on Steam.
To add your child as a Friend:
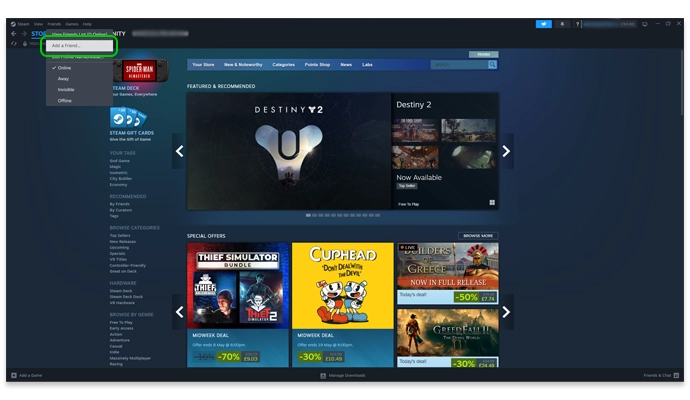
Step 1 – Using your child’s account, open their Steam client. Click Friends in the top menu then Add a Friend
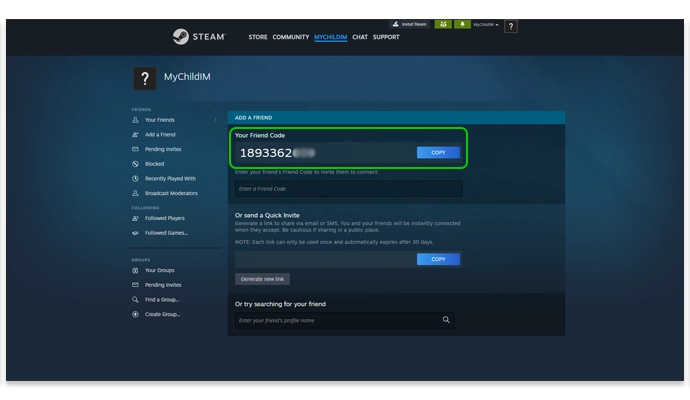
Step 2 – Make note of the number under Your Friend Code (or copy it). Then go to Add a Friend on your Steam client and account.
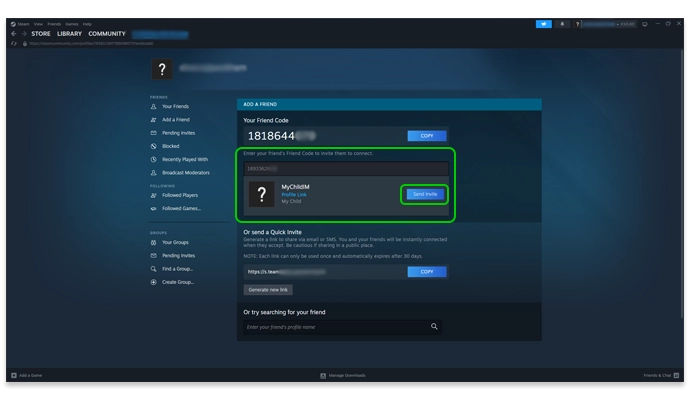
Step 3 – Enter your child’s Friend Code in the space below your own code. Confirm that the correct username comes up, then click Send Invite. Have your child accept the invite on their account.
You’re now connected as Friends.
How to turn on Steam’s parental controls
Once you’ve added your child to your Steam Family, you can start customizing their parental controls.
To turn on parental controls:
Step 1 – Within your Steam account and client, click Steam then Settings in the top menu.
Step 2 – Click Family and then Manage your Steam Family .
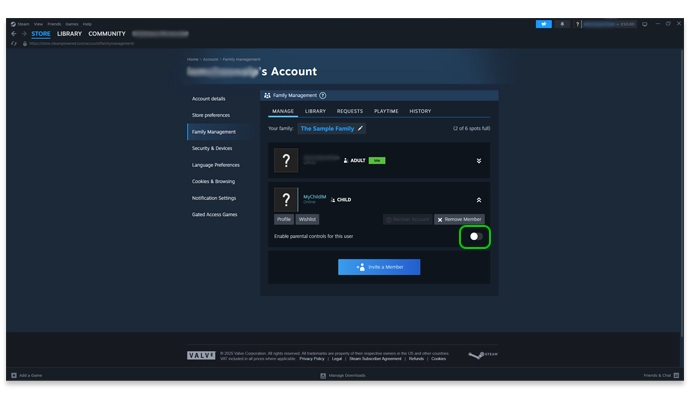
Step 3 – Click the arrows next to your child’s information. Next, click the toggle next to Enable parental controls for this user so it’s blue.
Your parental controls are now on. See further steps to make sure you customize their account settings.
Where to block inappropriate games
Once you have parental controls set up for your child’s Steam account, you can choose which games they can play.
Note that this only impacts games that your child accesses directly through Steam. For other game launchers, you’ll need to customize settings separately.
To block inappropriate games on Steam:
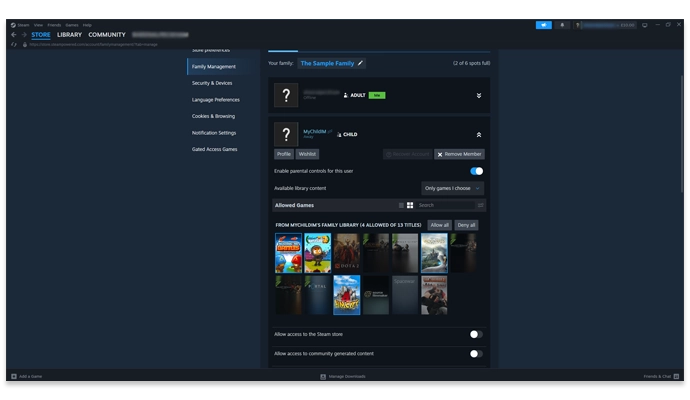
Step 1 – Once you’ve turned on parental controls on the Family Management page, you’ll see a list of games that your child has on their Steam account. Click the ones you’re happy for them to play.
Note that some games on this list are suggested rather than those actually on your child’s account.
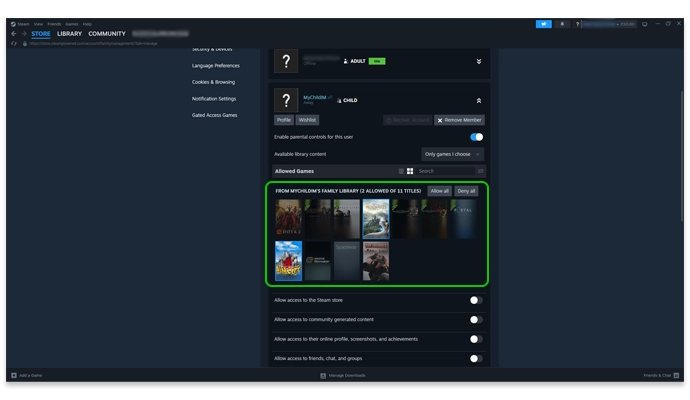
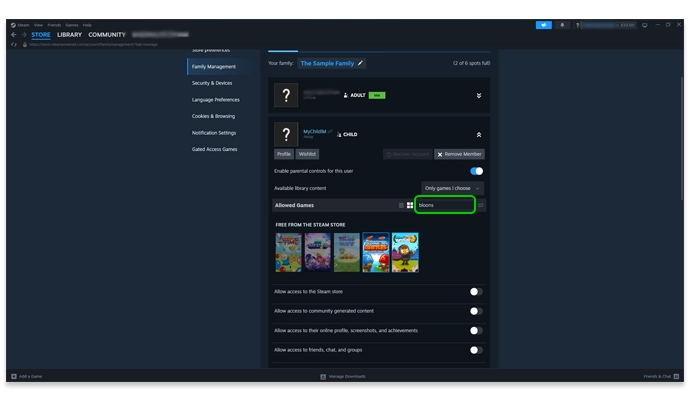
Step 2 – In the search bar, find the names of other games you’re happy for them to play. Click on them to add them to the Allowed games.
Adding Allowed games does not download the games. It just gives your child access to download them. If they search for a disallowed game, they won’t have the option to download it.
How to manage screen time on Steam
To set playtime limits:
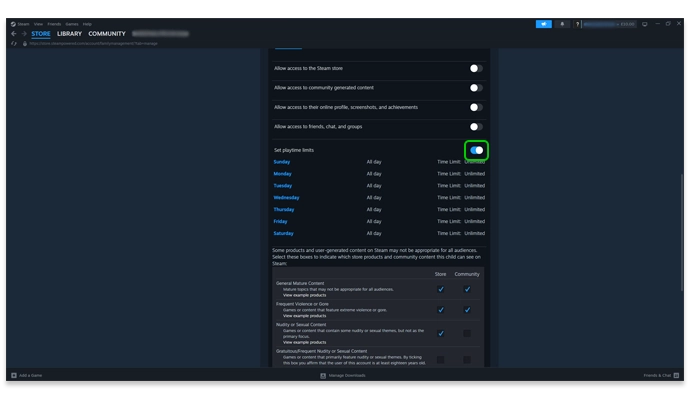
Step 1 – On the Family Management screen, click your child’s profile and scroll to Set playtime limits. Click the toggle to blue to turn playtime limits on.
Step 2 – Click on any day of the week to edit limits. First, next to Time Limit, select how much time you’d like to limit their gameplay on Steam each day. This applies to all games within Steam.
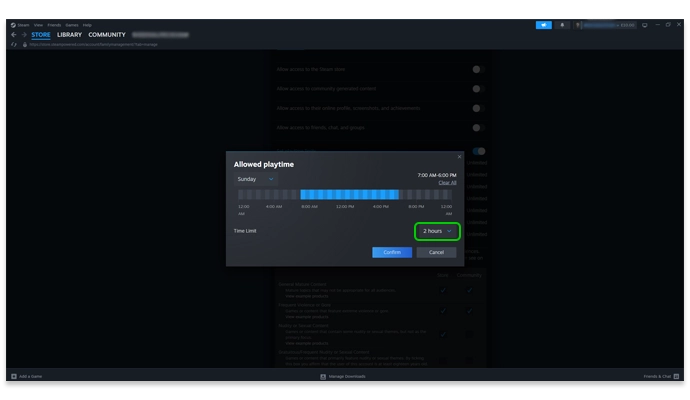
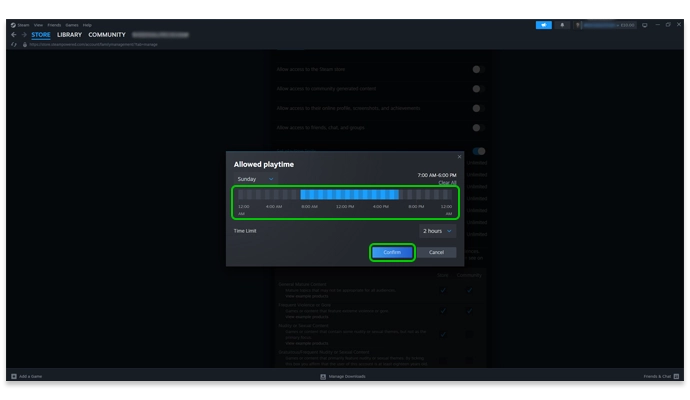
Step 3 – Next, modify the times that you allow them to play games on Steam. Any block that is highlighted blue represents time they can play. Any grey block shows when playtime is not allowed.
While you cannot customise playtimes for each day, you can set multiple ‘windows’ of playtime throughout the day.
Click Confirm when you’re done.
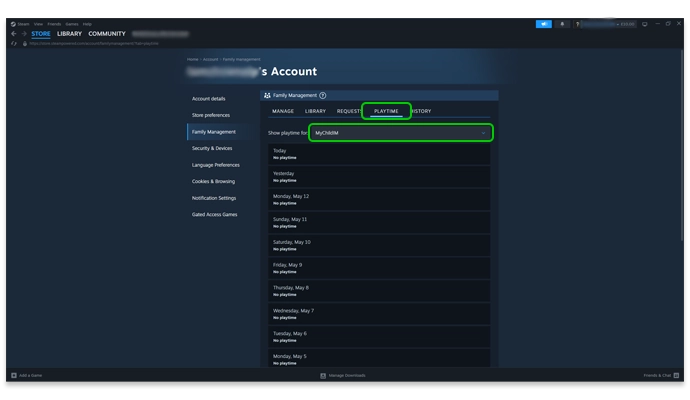
Step 4 – Scroll back up and click PLAYTIME in the Family Management menu. Select your child in the dropdown menu to review how much time they spend playing games throughout the week. This can help you review playtime limits on an ongoing basis.
Where to restrict inappropriate content
In addition to disallowing certain games on Steam, you can customize what kind of content your child can and cannot come across in the Steam Store and Steam Community.
While no filter is 100% effective, customizing these restrictions can improve your child’s safety.
To restrict inappropriate content:
Step 1 – In the Family Management menu, click your child and scroll just below the Allowed Games parental controls. Here, you can customize which permissions you wish to give your child. By default, they are all off.
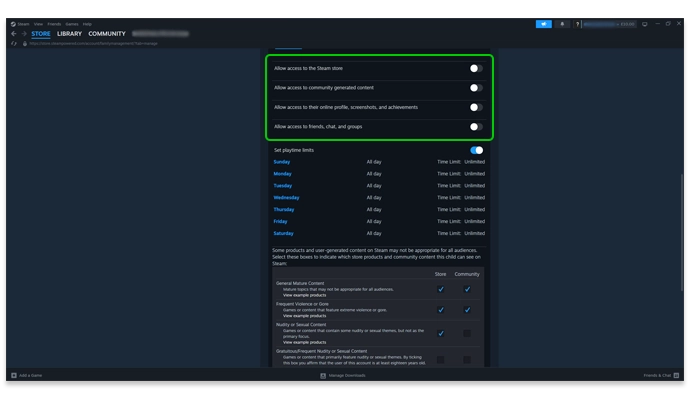
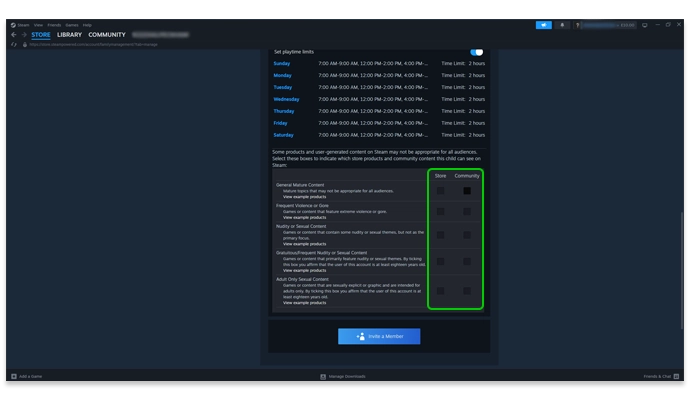
Step 2 – Scroll down below the screen time settings. Here, you can manage which content you’re okay with your child seeing. Untick all boxes to keep your child from seeing violent, sexual or otherwise mature content.
How to add money on Steam
Steam’s parental controls let you limit access to your child’s account. However, if you would like to give your child an allowance instead, you can add it directly to their account.
You might also need to add money to your own account to set up a Steam Family.
To add money on an account:
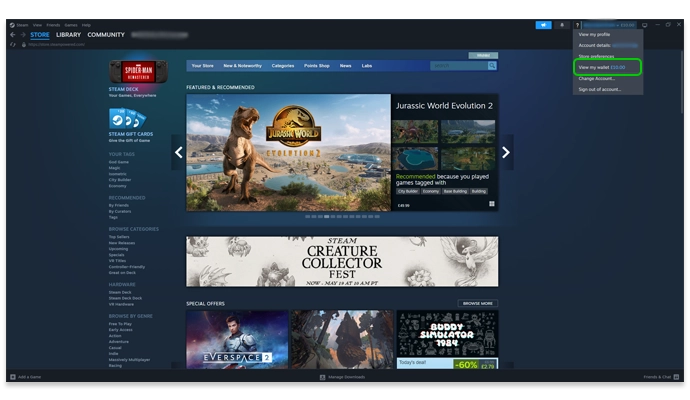
Step 1 – Click the user’s account name in the top right corner and select View my wallet.
If you do not see this option on your child’s account, review the parental controls you’ve set.
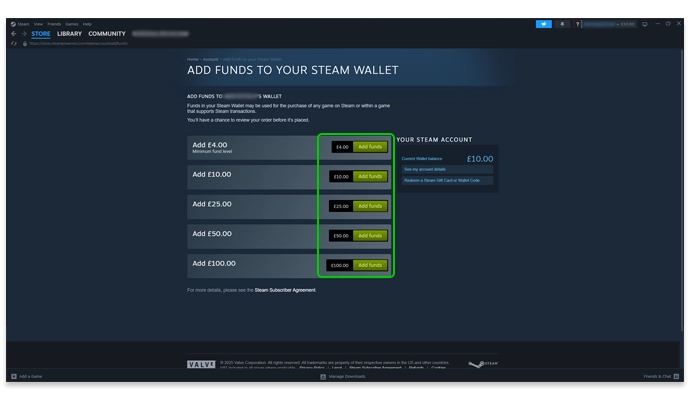
Step 2 – Select the amount you wish to add and follow the instructions to enter your payment details.
If on your child’s account, you might need to give permission on your account, so it’s a good idea to use separate devices.
Step 3 – From the same drop-down menu in Step 1, select Account details .
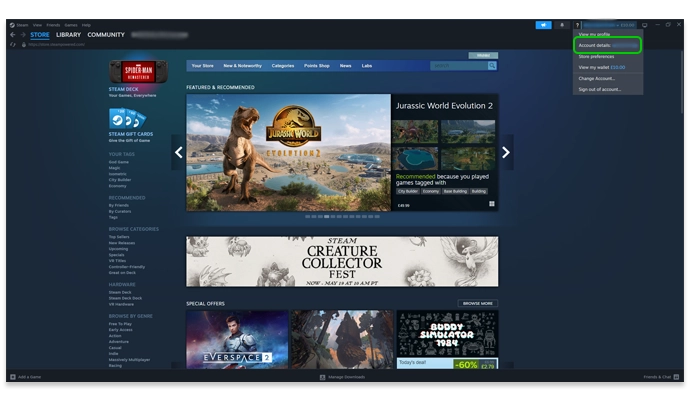
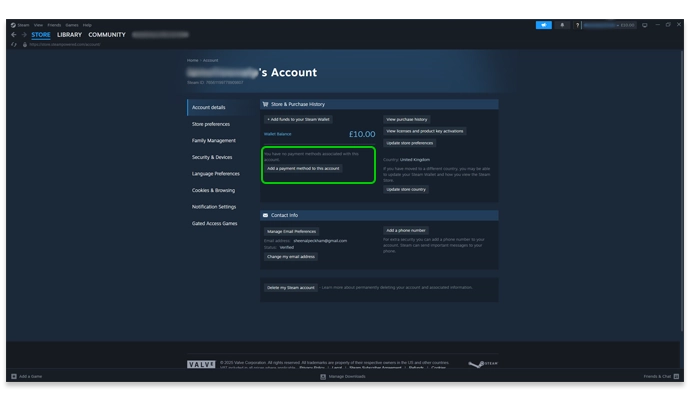
Step 4 – If adding money to your child’s account, double check that your card is not saved to the account. It should say Add a payment method to this account if no card is saved.